In Part 1 we looked at the hardware of the DAP-1520 and did some investigation into the stock D-Link firmware that runs on the device.
We found that there were two firmware images on the device, the main firmware (Image 1) and the recovery OS (Image 2) which is used when Image 1 fails verification.
Despite D-Link’s reputation for buggy firmwares, my infosec skills are still basic, and I wasn’t able to get telnetd running on the DAP-1520 to investigate the firmware more. Sure, we already have a dump of the firmware thanks to an SPI reader (and the update, available from D-Link’s website), but this only tells us what’s in the firmware, it doesn’t actually let us poke around at the hardware. Since my stated goal is to get OpenWrt running on the device, poking around at the hardware with a working OS is pretty important.
To accomplish this, I needed to build the firmware from the GPL source code published by D-Link. You can download the GPL source code for their routers from their Taiwanese website.
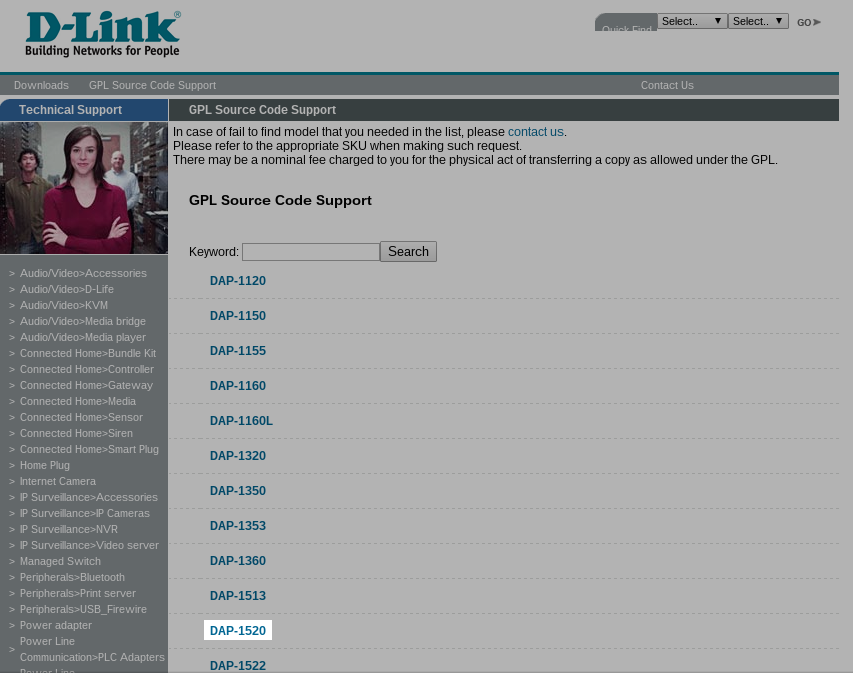
DAP-1520 GPL source code
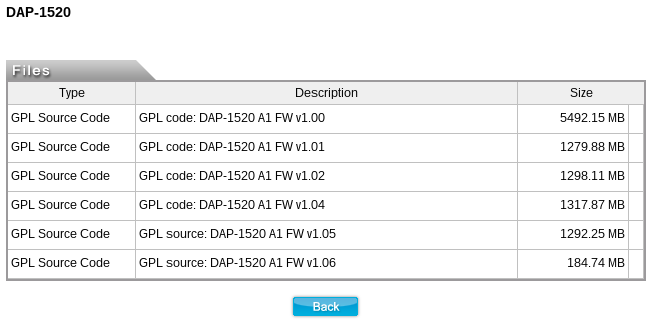
GPL source code for each firmware release
If you’re wondering why there’s a huge difference in the size of the source code between firmware versions, don’t. Firmware 1.05, despite the file extension, is just a tar file and is 185MB. Firmware 1.06 is a gzip compressed tar file and is 186MB. These inconsistencies are just the start of our wonderful journey with the D-Link source 😉
I’m building firmware 1.06, since newer is always better. I’ve just noticed that D-Link have published a file for firmware 1.07 on their Australian website. Hopefully they will release the GPL source for this firmware soon, I’m excited to see what vulnerabilities have been addressed in the web configurator!
Anyway, when you download the GPL source code, you will find that D-Link has included a README file, which describes how to build the firmware. This surprised me, I wasn’t expecting anything more than the source code, so some minor kudos go to D-Link for at least providing instructions.
Install & Build
===============
Environment:
    1. Download Ubuntu 10.04.4 LTS from http://releases.ubuntu.com/lucid/
        http://releases.ubuntu.com/lucid/ubuntu-10.04.4-server-i386.iso
    2. Install Ubuntu 10.04.4 LTS server in your computer.
    3. Make sure your Ubuntu is 10.04.4 LTS(Lucid Lynx).
    4. Building image with ROOT privileges.

Install:
    1.  Please update the list of available packages:
       ~#apt-get update
	   ~#apt-get install gcc build-essential zlib1g-dev bison flex subversion sharutils libncurses5-dev gawk help2man intltool pkg-config libglib2.0-dev
    2. Create a folder in root directory
       ~#mkdir /tftpboot/
    3. Install the toolchain:
		~#cd /DAP-1520_A1_106b04_FOSS/toolchain
		A.	GCC
				1.	cp buildroot-gcc342.tar.bz2 /opt
				2.	tar jxvf buildroot-gcc342.tar.bz2
		B.	LZMA
			    1.  cp lzma-4.32.7.tar.gz /home/
			    2.  tar -xvf lzma-4.32.7.tar.gz
				3.  cd lzma-4.32.7
				4.	./configure
				5.	make
				6.	make install
			    7.  ldconfig
		C.	XZ
				1.	cp xz-5.0.3.tar.bz2 /home/
				2.	tar jxvf xz-5.0.3.tar.bz2
				3.  cd xz-5.0.3
				4.	./configure
				5.	make
				6.	make install
		D.	mksquashfs
				1.  cp squashfs4.2.tar.bz2 /home/
				2.	tar jxvf squashfs4.2.tar.bz2
				3.	cd squashfs4.2/squashfs-tools
				4.	make
				5.	cp mksquashfs /opt/buildroot-gcc342/bin/mksquashfs_lzma-4.2
	4. Building the image & loader.
		(1). Please make sure the gcc-version is greater than 4.2.4
			 (You can type "~#gcc -v " to check the gcc-version)
		(2). Copy the DAP1520A1_GPL106b04.tar into /home/ directory
		     use following commands.
			~#tar -xvf DAP1520A1_GPL106b04.tar
		(3). You will get "AthSDK" directory.
			~#cd /home/AthSDK
		(4). Into the AthSDK directory,and run following commands.
			(4-1). If you want to build normal image
			~#make clean
			~#make kernel_clean
			~#make
			After make successfully, under "AthSDK/image/", you will get the normal image file "DAP1520A1_FW106B04.bin".
			(4-2). If you want to build backup image
			~#make -f Makefile.backup clean
			~#make kernel_clean
			~#make -f Makefile.backup
			After make successfully, under "AthSDK/image/", you will get the backup image file "DAP1520A1_FW100B03.bin".
			(4-3). If you want to build loader
			~#make loader_clean
			~#make mtk_loader
			After make successfully, under "AthSDK/image/", you will get the loader file "DAP1520A1_FW100.boot".
	5. Update the new firmware by web interface provided by device.
	6. Congratulations! You got your specific image now.
Install Ubuntu 10.04? Thanks, I think I will pass. Ubuntu 10.04 isn't supported anymore, so good luck installing all the packages you need to support the build environment. So, instead I decided to build the firmware on my laptop, which runs a reasonably current version of Arch Linux. On Arch Linux /tmp is a ramdisk, so I just do all my work there and make symlinks when necessary. I wouldn't recommend using /tmp for work unless you have >8GB of RAM as the /tmp filesystem is by default 50% of your RAM, and the compiled source code is somewhere around 2GB give or take.
The first step is to decompress the toolchain and create a symlink from DAP-1520_A1_106b04_FOSS/toolchain/ to /opt/buildroot-gcc342 because a bunch of their makefiles are hard coded to look in this place for the toolchain.
$ cd $(mktemp -d)
$ tar -zxvf ~/Downloads/DAP-1520\ A1_ver1.06b04_FOSS.tar.gz
$ cd DAP-1520_A1_106b04_FOSS/toolchain
$ tar -jxf buildroot-gcc342.tar.bz2
$ tar -zxf lzma-4.32.7.tar.gz
$ tar -jxf squashfs4.2.tar.bz2
$ ln -s $(pwd)/buildroot-gcc342 /opt/buildroot-gcc342
Then you'll need to compile the versions of lzma and squashfs provided, for reasons which I will get into in a bit. Copy the lzma and mksquashfs_lzma-4.2 binaries into the bin folder of your toolchain. I don't recommend running make install as they do in the instructions, just run make and manually copy the binaries to the toolchain/bin directory.
$ cd lzma-4.32.7
$ ./configure
$ make
$ cp src/lzma/lzma ../buildroot-gcc342/bin/
$ cd ../squashfs4.2/squashfs-tools
$ make
$ cp mksquashfs ../../buildroot-gcc342/bin/mksquashfs_lzma-4.2
The copy of mksquashfs_lzma-4.2 included in the toolchain links against an ancient version of liblzma.so which has long since not existed in Arch Linux. Hence, it's easier just to compile the version from the source code included. Just install xz from your package manager, I didn't need to compile their specific version.
Now that we have "installed" the toolchain, we need to decompress the actual source code for the router firmware and "install" it in /home/AthSDK:
$ cd ../../../src/
$ tar -zxf DAP1520A1_GPL106b04.tar.gz
$ sudo ln -s $(pwd)/AthSDK /home/AthSDK
Now we are all set to start building it as per the D-Link instructions above:
$ cd AthSDK
$ make clean
$ make kernel_clean
At this point, we need to fix some of the source files or the compilation will fail. You will need to download and run the next few patches in the AthSDK directory or compilation will fail with errors.
$ wget https://watchmysys.com/blog/wp-content/uploads/2016/03/timeconst.patch
$ wget https://watchmysys.com/blog/wp-content/uploads/2016/03/busybox_makefile.patch
$ wget https://watchmysys.com/blog/wp-content/uploads/2016/03/busybox_features.patch
$ wget https://watchmysys.com/blog/wp-content/uploads/2016/03/timer_makefile.patch
$ wget https://watchmysys.com/blog/wp-content/uploads/2016/03/telnetd.patch
$ wget https://watchmysys.com/blog/wp-content/uploads/2016/03/nc.patch
Some explanation is in order:
timeconst.patch to fix this.busybox_makefile.patch to fix this.busybox_features.patch to enable these features.timer which expects an object file to compile, except this object file is never created. Removing the line fixes the error and as far as I know timer still works as intended. You will need to apply the patch timer_makefile.patch to fix this.telnetd and nc patches create the sysconfig scripts in the rootfs folder of the D-Link OS$ patch -p1 < timeconst.patch patching file platform/MT7620/kernels/mips-linux-2.6.36.x/kernel/timeconst.pl $ patch -p1 < busybox_makefile.patch patching file apps/busybox-1.6.1/Makefile $ patch -p1 < busybox_features.patch patching file apps/busybox-1.6.1/.config $ patch -p1 < timer_makefile.patch patching file apps/timer/Makefile $ sudo patch -p1 < telnetd.patch patching file rootfs/target/etc/sysconfig/S3telnetd.sh $ sudo patch -p1 < nc.patch patching file rootfs/target/etc/sysconfig/S4nc.sh $ chmod 755 rootfs/target/etc/sysconfig/*sh $ install -d rootfs/target/bin $ ln -s busybox_161 rootfs/target/bin/nc
Now we can run the next command with sudo, as tar will attempt to create some files for the firmware which are owned by root. This will fail if not run as sudo:
$ sudo make
A long time later:
=================== installing wireless ===================
make -C wireless install || exit 1
make[1]: Entering directory '/tmp/tmp.41xjcpqbrX/DAP-1520_A1_106b04_FOSS/src/AthSDK/wireless'
make[1]: Leaving directory '/tmp/tmp.41xjcpqbrX/DAP-1520_A1_106b04_FOSS/src/AthSDK/wireless'
=================== installing rootfs ===================
make -C rootfs install || exit 1
make[1]: Entering directory '/tmp/tmp.41xjcpqbrX/DAP-1520_A1_106b04_FOSS/src/AthSDK/rootfs'
install -d /home/AthSDK/image
rm -rf /home/AthSDK/rootfs/target/man/ /home/AthSDK/rootfs/target/lib/*.a
Strip all .so
find /home/AthSDK/rootfs/target/lib/ -name "*.so*" -exec mipsel-linux-uclibc-strip '{}' ';'
cp -f /opt/buildroot-gcc342/lib/libdl* /home/AthSDK/rootfs/target/lib/
mipsel-linux-uclibc-strip target/lib/libdl-0.9.30.so
mipsel-linux-uclibc-strip: 'target/lib/libdl-0.9.30.so': No such file
Strip all exec
find /home/AthSDK/rootfs/target -type f -perm -u+x -exec mipsel-linux-uclibc-strip '{}' ';'
mipsel-linux-uclibc-strip: /home/AthSDK/rootfs/target/www/widget.cgi: File format not recognized
mipsel-linux-uclibc-strip: /home/AthSDK/rootfs/target/www/tr069.cgi: File format not recognized
mipsel-linux-uclibc-strip: /home/AthSDK/rootfs/target/www/save_configure.cgi: File format not recognized
mipsel-linux-uclibc-strip: /home/AthSDK/rootfs/target/www/hnap.cgi: File format not recognized
mipsel-linux-uclibc-strip: /home/AthSDK/rootfs/target/www/apply.cgi: File format not recognized
mipsel-linux-uclibc-strip: /home/AthSDK/rootfs/target/www/library/test/success.html: File format not recognized
mipsel-linux-uclibc-strip: /home/AthSDK/rootfs/target/usr/share/udhcpc/default.script: File format not recognized
mipsel-linux-uclibc-strip: /home/AthSDK/rootfs/target/usr/share/udhcpc/default.bound-nodns: File format not recognized
mipsel-linux-uclibc-strip: /home/AthSDK/rootfs/target/usr/share/udhcpc/default.bound-dns: File format not recognized
mipsel-linux-uclibc-strip: /home/AthSDK/rootfs/target/lib/libavahi-core.la: File format not recognized
mipsel-linux-uclibc-strip: /home/AthSDK/rootfs/target/lib/libavahi-common.la: File format not recognized
mipsel-linux-uclibc-strip: /home/AthSDK/rootfs/target/lib/libexpat.la: File format not recognized
mipsel-linux-uclibc-strip: /home/AthSDK/rootfs/target/lib/libdaemon.la: File format not recognized
mipsel-linux-uclibc-strip: /home/AthSDK/rootfs/target/etc/rdnssd-script: File format not recognized
mipsel-linux-uclibc-strip: /home/AthSDK/rootfs/target/etc/dhcp6c-script: File format not recognized
mipsel-linux-uclibc-strip: /home/AthSDK/rootfs/target/etc/host.conf: File format not recognized
mipsel-linux-uclibc-strip: /home/AthSDK/rootfs/target/etc/inittab: File format not recognized
mipsel-linux-uclibc-strip: /home/AthSDK/rootfs/target/etc/services: File format not recognized
mipsel-linux-uclibc-strip: /home/AthSDK/rootfs/target/etc/shadow: File format not recognized
mipsel-linux-uclibc-strip: /home/AthSDK/rootfs/target/etc/rdnssd/merge-hook: File format not recognized
mipsel-linux-uclibc-strip: /home/AthSDK/rootfs/target/etc/passwd: File format not recognized
mipsel-linux-uclibc-strip: /home/AthSDK/rootfs/target/etc/sysinfo: File format not recognized
mipsel-linux-uclibc-strip: /home/AthSDK/rootfs/target/etc/icon.ico: File format not recognized
mipsel-linux-uclibc-strip: /home/AthSDK/rootfs/target/etc/nvram.default: File format not recognized
mipsel-linux-uclibc-strip: /home/AthSDK/rootfs/target/etc/sysconfig/S2gpio.sh: File format not recognized
mipsel-linux-uclibc-strip: /home/AthSDK/rootfs/target/etc/issue: File format not recognized
mipsel-linux-uclibc-strip: /home/AthSDK/rootfs/target/etc/group: File format not recognized
mipsel-linux-uclibc-strip: /home/AthSDK/rootfs/target/etc/fstab: File format not recognized
mipsel-linux-uclibc-strip: /home/AthSDK/rootfs/target/etc/securetty: File format not recognized
mipsel-linux-uclibc-strip: /home/AthSDK/rootfs/target/etc/rc.d/rcS: File format not recognized
mipsel-linux-uclibc-strip: /home/AthSDK/rootfs/target/bin/gpio_event: File format not recognized
Strip Atheros's *.ko
find /home/AthSDK/rootfs/target/lib/modules/2.6.36.x -name "*.ko" -type f \
	-exec mipsel-linux-uclibc-strip -g -S -d \
	--strip-unneeded \
	--remove-section=__kcrctab \
	--remove-section=__kcrctab_gpl \
	--remove-section=__param \
	--remove-section=__ex_table \
	--remove-section=__obsparm \
	--remove-section=__versions \
	--remove-section=.pdr \
	--remove-section=.mdebug.abi32 \
	--remove-section=.comment \
	--remove-section=__ksymtab_gpl_future \
	--remove-section=__kcrctab_gpl_future \
	--remove-section=__ksymtab_unused \
	--remove-section=__kcrctab_unused \
	--remove-section=__ksymtab_unused_gpl \
	--remove-section=__kcrctab_unused_gpl \
	--remove-section=.ctors \
	--remove-section=__markers \
	--remove-section=__tracepoints \
	--remove-section=_ftrace_events \
	--remove-section=__mcount_loc \
	-x '{}' ';'
Strip Cameo's *.ko
Remove unneeded files
rm -f /home/AthSDK/rootfs/target/lib/modules/2.6.36.x/build
rm -f /home/AthSDK/rootfs/target/lib/modules/2.6.36.x/modules.order
rm -f /home/AthSDK/rootfs/target/lib/modules/2.6.36.x/source
rm -rf /home/AthSDK/rootfs/target/include
rm -rf /home/AthSDK/rootfs/target/lib/avahi
rm -rf /home/AthSDK/rootfs/target/lib/pkgconfig
rm -rf /home/AthSDK/rootfs/target/root
rm -f /home/AthSDK/rootfs/target/lib/modules/2.6.36.x/net/ath_pktlog.ko
cp /home/AthSDK/platform/MT7620/kernels/mips-linux-2.6.36.x/arch/mips/boot/vmlinux.* /home/AthSDK/image/ || exit 1;
/home/AthSDK/tools/release_scripts/mkuImage.sh
+ case $BOARD_TYPE in
+ LDADDR=0x80000000
++ readelf -a /home/AthSDK/platform/MT7620/kernels/mips-linux-2.6.36.x/vmlinux
++ grep Entry
++ head -1
++ cut -d: -f 2
+ ENTRY='               0x8000c310'
+ /home/AthSDK/tools/release_scripts/mkimage -A mips -O linux -T kernel -C lzma -a 0x80000000 -e 0x8000c310 -n 'Linux Kernel Image' -d /home/AthSDK/image/vmlinux.lzma /home/AthSDK/image/vmlinux.lzma.ub
Image Name:   Linux Kernel Image
Created:      Sun Mar  6 23:20:20 2016
Image Type:   MIPS Linux Kernel Image (lzma compressed)
Data Size:    908125 Bytes = 886.84 kB = 0.87 MB
Load Address: 0x80000000
Entry Point:  0x8000C310
/home/AthSDK/tools/release_scripts/release_rootfs.sh
=================== Create SQUASHFS for DAP-1520 ===================
Parallel mksquashfs: Using 4 processors
Creating 4.0 filesystem on /home/AthSDK/image/MT7620-squash, block size 65536.
[===========================================================================================\] 524/524 100%
Exportable Squashfs 4.0 filesystem, xz compressed, data block size 65536
	compressed data, compressed metadata, compressed fragments, compressed xattrs
	duplicates are removed
Filesystem size 3370.39 Kbytes (3.29 Mbytes)
	28.91% of uncompressed filesystem size (11656.43 Kbytes)
Inode table size 5286 bytes (5.16 Kbytes)
	24.23% of uncompressed inode table size (21816 bytes)
Directory table size 5948 bytes (5.81 Kbytes)
	46.62% of uncompressed directory table size (12759 bytes)
Number of duplicate files found 46
Number of inodes 650
Number of files 419
Number of fragments 56
Number of symbolic links  125
Number of device nodes 53
Number of fifo nodes 0
Number of socket nodes 0
Number of directories 53
Number of ids (unique uids + gids) 1
Number of uids 1
	root (0)
Number of gids 1
	root (0)
=================== MAX_ROOTFS_IMG_SIZE=3801062 Bytes ===================
0+1 records in
1+0 records out
3801062 bytes (3.8 MB) copied, 0.00318195 s, 1.2 GB/s
=================== MT7620 Squashfs created for 8 MB FLASH ===================
/home/AthSDK/tools/release_scripts/release_image.sh
0+1 records in
1+0 records out
983040 bytes (983 kB) copied, 0.00105716 s, 930 MB/s
make[1]: Leaving directory '/tmp/tmp.41xjcpqbrX/DAP-1520_A1_106b04_FOSS/src/AthSDK/rootfs'
=================== Finish ===================
We need to verify that the file produced matches the official firmware update available from D-Link. It really wouldn't do to flash an XZ compressed kernel when the bootloader expects an LZMA compressed kernel!
$ binwalk image/DAP1520A1_FW106B04.bin

DECIMAL       HEXADECIMAL     DESCRIPTION
--------------------------------------------------------------------------------
0             0x0             uImage header, header size: 64 bytes, header CRC: 0x9D3D95E7, created: 2016-03-07 19:18:42, image size: 909160 bytes, Data Address: 0x80000000, Entry Point: 0x8000C310, data CRC: 0x77D76472, OS: Linux, CPU: MIPS, image type: OS Kernel Image, compression type: lzma, image name: "Linux Kernel Image"
64            0x40            LZMA compressed data, properties: 0x5D, dictionary size: 33554432 bytes, uncompressed size: 2798288 bytes
983040        0xF0000         Squashfs filesystem, little endian, version 4.0, compression:xz, size: 3451228 bytes, 650 inodes, blocksize: 65536 bytes, created: 2016-03-07 19:18:45
Good, this matches the D-Link provided firmware update, so we should be all good to flash it to the router and see if we can login.
Gotchas
mksquashfs
I had originally installed mksquashfs from pacman, because why would you want to use the old version included in the D-Link source?
Hilariously, the version of mksquashfs_lzma-4.2 included in the D-Link source doesn't actually support LZMA compression at all, instead using xz compression by default!
SYNTAX:/opt/buildroot-gcc342/bin/mksquashfs_lzma-4.2 source1 source2 ...  dest [options] [-e list of exclude
dirs/files]

Filesystem build options:
-comp 		select  compression
			Compressors available:
				gzip
				xz (default)

(other options omitted)

Compressors available and compressor specific options:
	gzip (no options)
	xz (default)
	  -Xbcj filter1,filter2,...,filterN
		Compress using filter1,filter2,...,filterN in turn
		(in addition to no filter), and choose the best compression.
		Available filters: x86, arm, armthumb, powerpc, sparc, ia64
	  -Xdict-size
		Use  as the XZ dictionary size.  The dictionary size
		can be specified as a percentage of the block size, or as an
		absolute value.  The dictionary size must be less than or equal
		to the block size and 8192 bytes or larger.  It must also be
		storable in the xz header as either 2^n or as 2^n+2^(n+1).
		Example dict-sizes are 75%, 50%, 37.5%, 25%, or 32K, 16K, 8K
		etc.
This differs from mksquashfs included in Arch Linux, which uses gzip by default! If you just go ahead and build the image using mksquashfs provided by your package manager, you will end up with a filesystem which is too large, and the build process will fail!
$ mksquashfs -h
SYNTAX:mksquashfs source1 source2 ...  dest [options] [-e list of exclude
dirs/files]

Filesystem build options:
-comp 		select  compression
			Compressors available:
				gzip (default)

(other options omitted)

Compressors available and compressor specific options:
	gzip (default)
	  -Xcompression-level
		 should be 1 .. 9 (default 9)
	  -Xwindow-size
		 should be 8 .. 15 (default 15)
	  -Xstrategy strategy1,strategy2,...,strategyN
		Compress using strategy1,strategy2,...,strategyN in turn
		and choose the best compression.
		Available strategies: default, filtered, huffman_only,
		run_length_encoded and fixed
	lzma (no options)
	lzo
	  -Xalgorithm
		Where  is one of:
			lzo1x_1
			lzo1x_1_11
			lzo1x_1_12
			lzo1x_1_15
			lzo1x_999 (default)
	  -Xcompression-level
		 should be 1 .. 9 (default 8)
		Only applies to lzo1x_999 algorithm
	lz4
	  -Xhc
		Compress using LZ4 High Compression
	xz
	  -Xbcj filter1,filter2,...,filterN
		Compress using filter1,filter2,...,filterN in turn
		(in addition to no filter), and choose the best compression.
		Available filters: x86, arm, armthumb, powerpc, sparc, ia64
	  -Xdict-size
		Use  as the XZ dictionary size.  The dictionary size
		can be specified as a percentage of the block size, or as an
		absolute value.  The dictionary size must be less than or equal
		to the block size and 8192 bytes or larger.  It must also be
		storable in the xz header as either 2^n or as 2^n+2^(n+1).
		Example dict-sizes are 75%, 50%, 37.5%, 25%, or 32K, 16K, 8K
		etc.
At least the build process will fail and tell you the image is too large, instead of making an image which will brick your router...
lzma
Again I was wondering, why should I use the old version of LZMA included in the D-Link source, when Arch Linux ships which a much newer (and thus better) version of LZMA? It might occur to you, that I haven't learned my lesson yet from the previous experience with mksquashfs...
The lzma included in D-Link's source:
$ /opt/buildroot-gcc342/bin/lzma -h

lzma 4.32.7 Copyright (C) 2005 Ville Koskinen
Based on LZMA SDK 4.32 Copyright (C) 1999-2005 Igor Pavlov

Usage: /opt/buildroot-gcc342/bin/lzma [flags and input files in any order]
  -c --stdout       output to standard output
  -d --decompress   force decompression
  -z --compress     force compression
  -k --keep         keep (don't delete) input files
  -f --force        force overwrite of output file and compress links
  -t --test         test compressed file integrity
  -S .suf  --suffix .suf   use suffix .suf on compressed files
  -q --quiet        suppress error messages
  -v --verbose      be verbose
  -h --help         print this message
  -L --license      display the license information
  -V --version      display version numbers of LZMA SDK and lzma
  -1 .. -2          fast compression
  -3 .. -9          good to excellent compression. -7 is the default.
     --fast         alias for -1
     --best         alias for -9 (usually *not* what you want)

  Memory usage depends a lot on the chosen compression mode -1 .. -9.
  See the man page lzma(1) for details.
And lzma from Arch Linux:
$ lzma -h
Usage: lzma [OPTION]... [FILE]...
Compress or decompress FILEs in the .xz format.

  -z, --compress      force compression
  -d, --decompress    force decompression
  -t, --test          test compressed file integrity
  -l, --list          list information about .xz files
  -k, --keep          keep (don't delete) input files
  -f, --force         force overwrite of output file and (de)compress links
  -c, --stdout        write to standard output and don't delete input files
  -0 ... -9           compression preset; default is 6; take compressor *and*
                      decompressor memory usage into account before using 7-9!
  -e, --extreme       try to improve compression ratio by using more CPU time;
                      does not affect decompressor memory requirements
  -T, --threads=NUM   use at most NUM threads; the default is 1; set to 0
                      to use as many threads as there are processor cores
  -q, --quiet         suppress warnings; specify twice to suppress errors too
  -v, --verbose       be verbose; specify twice for even more verbose
  -h, --help          display this short help and exit
  -H, --long-help     display the long help (lists also the advanced options)
  -V, --version       display the version number and exit

With no FILE, or when FILE is -, read standard input.

Report bugs to  (in English or Finnish).
XZ Utils home page:
So, apart from the newer output looking much more like a standard GNU utility, you might have noticed that the older copy of lzma compresses with a default compression of -7 while the newer version compresses with a default compression of -6.
If you think this doesn't make a difference, let me just tell you now, it does. A big one. The difference between -6 and -7 is the difference between a kernel that boots, and one that doesn't.
This firmware was built with the D-Link SDK version of lzma and will boot:
$ binwalk image/DAP1520A1_FW106B04.bin

DECIMAL       HEXADECIMAL     DESCRIPTION
--------------------------------------------------------------------------------
0             0x0             uImage header, header size: 64 bytes, header CRC: 0x46768407, created: 2016-03-05 22:33:15, image size: 909272 bytes, Data Address: 0x80000000, Entry Point: 0x8000C310, data CRC: 0x4993B2D9, OS: Linux, CPU: MIPS, image type: OS Kernel Image, compression type: lzma, image name: "Linux Kernel Image"
64            0x40            LZMA compressed data, properties: 0x5D, dictionary size: 33554432 bytes, uncompressed size: 2798288 bytes
983040        0xF0000         Squashfs filesystem, little endian, version 4.0, compression:xz, size: 3445784 bytes, 655 inodes, blocksize: 65536 bytes, created: 2016-03-05 22:33:20
This firmware was built with the Arch Linux version of lzma and won't boot:
$ binwalk image/DAP1520A1_FW106B04.bin

DECIMAL       HEXADECIMAL     DESCRIPTION
--------------------------------------------------------------------------------
0             0x0             uImage header, header size: 64 bytes, header CRC: 0x7A57558F, created: 2016-03-07 20:41:46, image size: 908147 bytes, Data Address: 0x80000000, Entry Point: 0x8000C310, data CRC: 0x8E0F6C03, OS: Linux, CPU: MIPS, image type: OS Kernel Image, compression type: lzma, image name: "Linux Kernel Image"
983040        0xF0000         Squashfs filesystem, little endian, version 4.0, compression:xz, size: 3451428 bytes, 653 inodes, blocksize: 65536 bytes, created: 2016-03-07 20:41:49
So, what exactly happens when you flash this image to the device? Does it do some verification before flashing and stop you? Does it flash the image, and then when Image 1 fails to boot it boots the linux4b image and start rootfsb so you can recover the device?
Not quite...
Image1 Try Counter --> 0

Image1: OK Image2: OK
Both images are OK!!!

=================================================

Please choose the operation:
   1: Load system code to SDRAM via TFTP.
   2: Load system code then write to Flash via TFTP.
   3: Boot system code via Flash (default).
   4: Entr boot command line interface.
   7: Load Boot Loader code then write to Flash via Serial.
   9: Load Boot Loader code then write to Flash via TFTP.
 1  0

3: System Boot system code via Flash.
## Booting image at bc050000 ...
raspi_read: from:50000 len:40
   Image Name:   Linux Kernel Image
   Image Type:   MIPS Linux Kernel Image (lzma compressed)
   Data Size:    908132 Bytes = 886.8 kB
   Load Address: 80000000
   Entry Point:  8000c310
raspi_read: from:50040 len:ddb64
   Verifying Checksum ... OK
   Uncompressing Kernel Image ... LZMA ERROR 1 - must RESET board to recover
So, no. No verification of the validity of the kernel in the update before flashing. And no, it won't boot from Image 2. You will just see this error, over and over, while the device resets. You might think that Image1 Try Counter would increment, and after a threshold it would boot into the recovery environment, but no. Congratulations, you are now the proud owner of a brick. Get out your SPI flashing tool, because there's no other way around this disaster.
This does beg the question, how do you get the device to boot into Image 2? Well, after the LZMA compression snafu on the kernel, I thought I would save some time and just flash the vmlinuz.ub file created by the build script to flash and be done with it... nope!
Check image validation:
Image1 Header Magic Number --> OK
Image2 Header Magic Number --> OK
Image1 Header Checksum --> OK
Image2 Header Checksum --> OK
Image1 Data Checksum --> raspi_read: from:50040 len:de000
Failed
Image2 Data Checksum --> raspi_read: from:4f0040 len:ca8f4
OK
Image1 Stable Flag --> Not stable
Image1 Try Counter --> 0

Image1: Broken Image2: OK
Only Image1 is borken!!

=================================================

Please choose the operation:
   1: Load system code to SDRAM via TFTP.
   2: Load system code then write to Flash via TFTP.
   3: Boot system code via Flash (default).
   4: Entr boot command line interface.
   7: Load Boot Loader code then write to Flash via Serial.
   9: Load Boot Loader code then write to Flash via TFTP.
 1  0

3: System Boot system code via Flash.
## Booting image at bc4f0000 ...
raspi_read: from:4f0000 len:40
   Image Name:   Linux Kernel Image
   Image Type:   MIPS Linux Kernel Image (lzma compressed)
   Data Size:    829684 Bytes = 810.2 kB
   Load Address: 80000000
   Entry Point:  8000c310
raspi_read: from:4f0040 len:ca8f4
   Verifying Checksum ... OK
   Uncompressing Kernel Image ... OK
No initrd
## Transferring control to Linux (at address 8000c310) ...
## Giving linux memsize in MB, 64

Starting kernel ...


LINUX started...

 THIS IS ASIC
Linux version 2.6.36.x (root@ckwork-desktop) (gcc version 3.4.2) #1 Thu Sep 26 16:47:12 CST 2013
Couple of things to note here:
- Only Image1 is borken!!
- The kernel in
Image 2is much older, and was built on a different host, than the kernel inImage 1from D-Link
When you do flash a working firmware back onto the router, you get a surprise when it boots. Because Image1 is borken!! the device rewrites all the nvram variables to their defaults.
init NVRAM_SPACE from mtdblock size
init nvram memory map size: 0x10000 order of pages: 0x4
nvram module init:
	/dev/nvram major number 225 glues to mtd: "nvram" size: 0x00010000
	nvram_space: 0x00010000 mapped via mmap(2)
openfile :/etc/sysinfo
openfile :/etc/nvram.default
nvram_sanity_check: restore key: uplink_set_by_user="0"
nvram_sanity_check: restore key: language="default"
nvram_sanity_check: restore key: ap_ipv6_wan_specify_dns="0"
nvram_sanity_check: restore key: ap_ipv6_autoconfig_secondary_dns=""
nvram_sanity_check: restore key: ap_ipv6_autoconfig_primary_dns=""
nvram_sanity_check: restore key: ap_ipv6_autoconfig_dns_enable="0"
nvram_sanity_check: restore key: ap_ipv6_static_secondary_dns=""
nvram_sanity_check: restore key: ap_ipv6_static_primary_dns=""
nvram_sanity_check: restore key: ap_ipv6_static_default_gw=""
nvram_sanity_check: restore key: ap_ipv6_static_prefix_length=""
nvram_sanity_check: restore key: ap_ipv6_static_lan_ip=""
nvram_sanity_check: restore key: ap_ipv6_wan_proto="ipv6_autoconfig"
nvram_sanity_check: restore key: pure_support_url="http://support.dlink.com/products/view.asp?productid=DAP-1520"
nvram_sanity_check: restore key: pure_reboot_page="reboot.htm"
nvram_sanity_check: restore key: pure_parental_url=""
nvram_sanity_check: restore key: pure_block_url=""
nvram_sanity_check: restore key: pure_wireless_url_new="/Wireless.htm"
nvram_sanity_check: restore key: pure_wireless_url="/wireless.htm"
nvram_sanity_check: restore key: pure_presentation_url="/Device_Info.htm"
nvram_sanity_check: restore key: pure_model_description="Wireless Repeater"
nvram_sanity_check: restore key: pure_vendor_name="D-Link"
nvram_sanity_check: restore key: pure_device_name="D-Link Systems DAP-1520"
nvram_sanity_check: restore key: pure_type_new="WiFiAccessPoint"
nvram_sanity_check: restore key: pure_type="Repeater"
nvram_sanity_check: restore key: default_downlink_ssid="1"
nvram_sanity_check: restore key: wlan1_wps_wizard="0"
nvram_sanity_check: restore key: setup_wizard_ap="1"
nvram_sanity_check: restore key: log_response_type="system|debug|attack|dropped|notice"
nvram_sanity_check: restore key: log_current_page="0"
nvram_sanity_check: restore key: log_total_page="0"
nvram_sanity_check: restore key: log_per_page="10"
nvram_sanity_check: restore key: log_notice="1"
nvram_sanity_check: restore key: log_dropped_packets="0"
nvram_sanity_check: restore key: log_attacks="1"
nvram_sanity_check: restore key: log_debug_information="0"
nvram_sanity_check: restore key: log_system_activity="1"
nvram_sanity_check: restore key: syslog_server="0/0.0.0.0"
nvram_sanity_check: restore key: time_daylight_offset="3600"
nvram_sanity_check: restore key: time_daylight_saving_end_time="1"
nvram_sanity_check: restore key: time_daylight_saving_end_day_of_week="1"
nvram_sanity_check: restore key: time_daylight_saving_end_week="2"
nvram_sanity_check: restore key: time_daylight_saving_end_month="11"
nvram_sanity_check: restore key: time_daylight_saving_start_time="1"
nvram_sanity_check: restore key: time_daylight_saving_start_day_of_week="1"
nvram_sanity_check: restore key: time_daylight_saving_start_week="3"
nvram_sanity_check: restore key: time_daylight_saving_start_month="3"
nvram_sanity_check: restore key: time_daylight_saving_enable="0"
nvram_sanity_check: restore key: ntp_sync_interval="168"
nvram_sanity_check: restore key: ntp_default_server="ntp1.dlink.com,ntp.dlink.com.tw"
nvram_sanity_check: restore key: ntp_server=""
nvram_sanity_check: restore key: time_zone_area="4"
nvram_sanity_check: restore key: time_zone="-128"
nvram_sanity_check: restore key: ntp_client_enable="0"
nvram_sanity_check: restore key: session_timeout="180"
nvram_sanity_check: restore key: graph_enable="none"
nvram_sanity_check: restore key: system_time="2011/01/01/00/00/00"
nvram_sanity_check: restore key: serial_number="none"
nvram_sanity_check: restore key: model_url="http://support.dlink.com"
nvram_sanity_check: restore key: model_name="D-Link Repeater"
nvram_sanity_check: restore key: manufacturer_url="http://www.dlink.com"
nvram_sanity_check: restore key: manufacturer="D-Link"
nvram_sanity_check: restore key: friendlyname="DAP-1520"
nvram_sanity_check: restore key: model_number="DAP-1520"
nvram_sanity_check: restore key: hostname="DAP-1520"
nvram_sanity_check: restore key: wlan1_11n_protection="auto"
nvram_sanity_check: restore key: wlan1_wps_enable="1"
nvram_sanity_check: restore key: wlan1_psk_pass_phrase="1234567890"
nvram_sanity_check: restore key: wlan1_psk_cipher_type="both"
nvram_sanity_check: restore key: wlan1_wep_display="hex"
nvram_sanity_check: restore key: wlan1_wep128_key="00000000000000000000000000"
nvram_sanity_check: restore key: wlan1_wep64_key="0000000000"
nvram_sanity_check: restore key: wlan1_security="disable"
nvram_sanity_check: restore key: wlan1_ssid=""
nvram_sanity_check: restore key: wlan_repeater_mode="1"
nvram_sanity_check: restore key: wlan0_disable_wps_pin="1"
nvram_sanity_check: restore key: wlan0_wps_configured_mode="5"
nvram_sanity_check: restore key: wlan0_wps_enable="1"
nvram_sanity_check: restore key: wlan0_disablecoext="0"
nvram_sanity_check: restore key: wlan0_rxchainmask="3"
nvram_sanity_check: restore key: wlan0_txchainmask="3"
nvram_sanity_check: restore key: wlan0_gkey_rekey_time="3600"
nvram_sanity_check: restore key: wlan0_11n_protection="auto"
nvram_sanity_check: restore key: wlan0_wmm_enable="1"
nvram_sanity_check: restore key: wlan0_short_gi="1"
nvram_sanity_check: restore key: wlan0_partition="0"
nvram_sanity_check: restore key: wlan0_dtim="1"
nvram_sanity_check: restore key: wlan0_fragmentation="2346"
nvram_sanity_check: Raeth v3.0 (reTaskletst,SkbRecycleo)
nvram_sanity_check: restore key: wlan0_beacon_interval="100"
nvram_sanity_check: restore key: wlan0_txpower="100"
nvram_sanity_check: restore key: wlan0_psk_cipher_type="both"
nvram_sanity_check: restore key: wlan0_wep_display="hex"
nvram_sanity_check: restore key: wlan0_wep128_key="00000000000000000000000000"
nvram_sanity_check: restore key: wlan0_wep64_key="0000000000"
nvram_sanity_check: restore key: wlan0_ssid_broadcast="1"
nvram_sanity_check: restore key: wlan0_dot11_mode="11bgn"
nvram_sanity_check: restore key: wlan0_auto_channel_enable="1"
nvram_sanity_check: restore key: wlan0_channel="6"
nvram_sanity_check: restore key: wlan0_enable="1"
nvram_sanity_check: restore key: wlan0_5g_fragmentation="2346"
nvram_sanity_check: restore key: wlan0_5g_rts_threshold="2347"
nvram_sanity_check: restore key: wlan0_5g_dfs_enable="0"
nvram_sanity_check: restore key: wlan0_5g_11n_protection="adevice eth2 entered promiscuous mode
uto"
nvram_sanity_check: restore key: wlan0_5g_wep128_key="00000000000000000000000000"
nvram_sanity_check: restore key: wlan0_5g_wep64_key="0000000000"
nvram_sanity_check: restore key: wlan0_5g_psk_cipher_type="both"
nvram_sanity_check: restore key: wlan0_5g_wep_display="hex"
nvram_sanity_check: restore key: wlan0_5g_wmm_enable="1"
nvram_sanity_check: restore key: wlan0_5g_txpower="100"
nvram_sanity_check: restore key: wlan0_5g_dtim="1"
nvram_sanity_check: restore key: wlan0_5g_beacon_interval="100"
nvram_sanity_check: restore key: wlan0_5g_auto_channel_enable="1"
nvram_sanity_check: restore key: wlan0_5g_channel="36"
nvram_sanity_check: restore key: wlan0_5g_dot11_mode="11anac"
nvram_sanity_check: restore key: dhcpc_enable="1"
nvram_sanity_check: restore key: ap_device_name="dlinkap"
nvram_sanity_check: restore key: ap_secondary_dns="0.0.0.0"
nvram_sanity_check: restore key: ap_primary_dns="0.0.0.0"
nvram_sanity_check: restore key: ap_gateway="0.0.0.0"
nvram_sanity_check: restore key: ap_netmask="255.255.255.0"
nvram_sanity_check: restore key: ap_ipaddr="192.168.0.50"
nvram_sanity_check: restore key: lan_bridge="br0"
nvram_sanity_check: restore key: lan_eth="eth2"
nvram_sanity_check: restore key: admin_password=""
nvram_sanity_check: restore key: admin_username="admin"
Solid defaults there, D-Link. I think this is the first device I've ever encountered where the admin password was actually blank. I setup the device initially, and then it rebooted and asked me for a password to login. Even working in IT, I never thought to try an empty password. I mean, who does that?! D-Link does that.
And just while writing this I realized that I can look at the nvram defaults any time I want to in /etc/nvram.defaults. This is why you use the 15 minute rule, people.
Below is a firmware with nc running on port 8023 if you have a DAP-1520 and you want to poke around the D-Link firmware. Telnet asks for a username and password, and none of the combinations I could think of let me login.
nc 192.168.0.50 8023
Enjoy your root shell!
Firmware DAP1520A1_FW106B04.bin (gzip compressed) with nc backdoor.
md5sum: 31397369d0631183c3823d9933bede5f
sha1sum: 2951f4e36b05014cbc327acf5c9d6e860ac2f0a5
sha256sum: 6dd416c6f26e17f059dcc531e2a882a64e3af0594bd3720da669af631c34e50b