Tag Archives: x10sle-f

Powering a Supermicro Micro Cloud node

You can often find good deals online for blade servers, but the critical question is always: can you power it without an expensive and loud chassis?

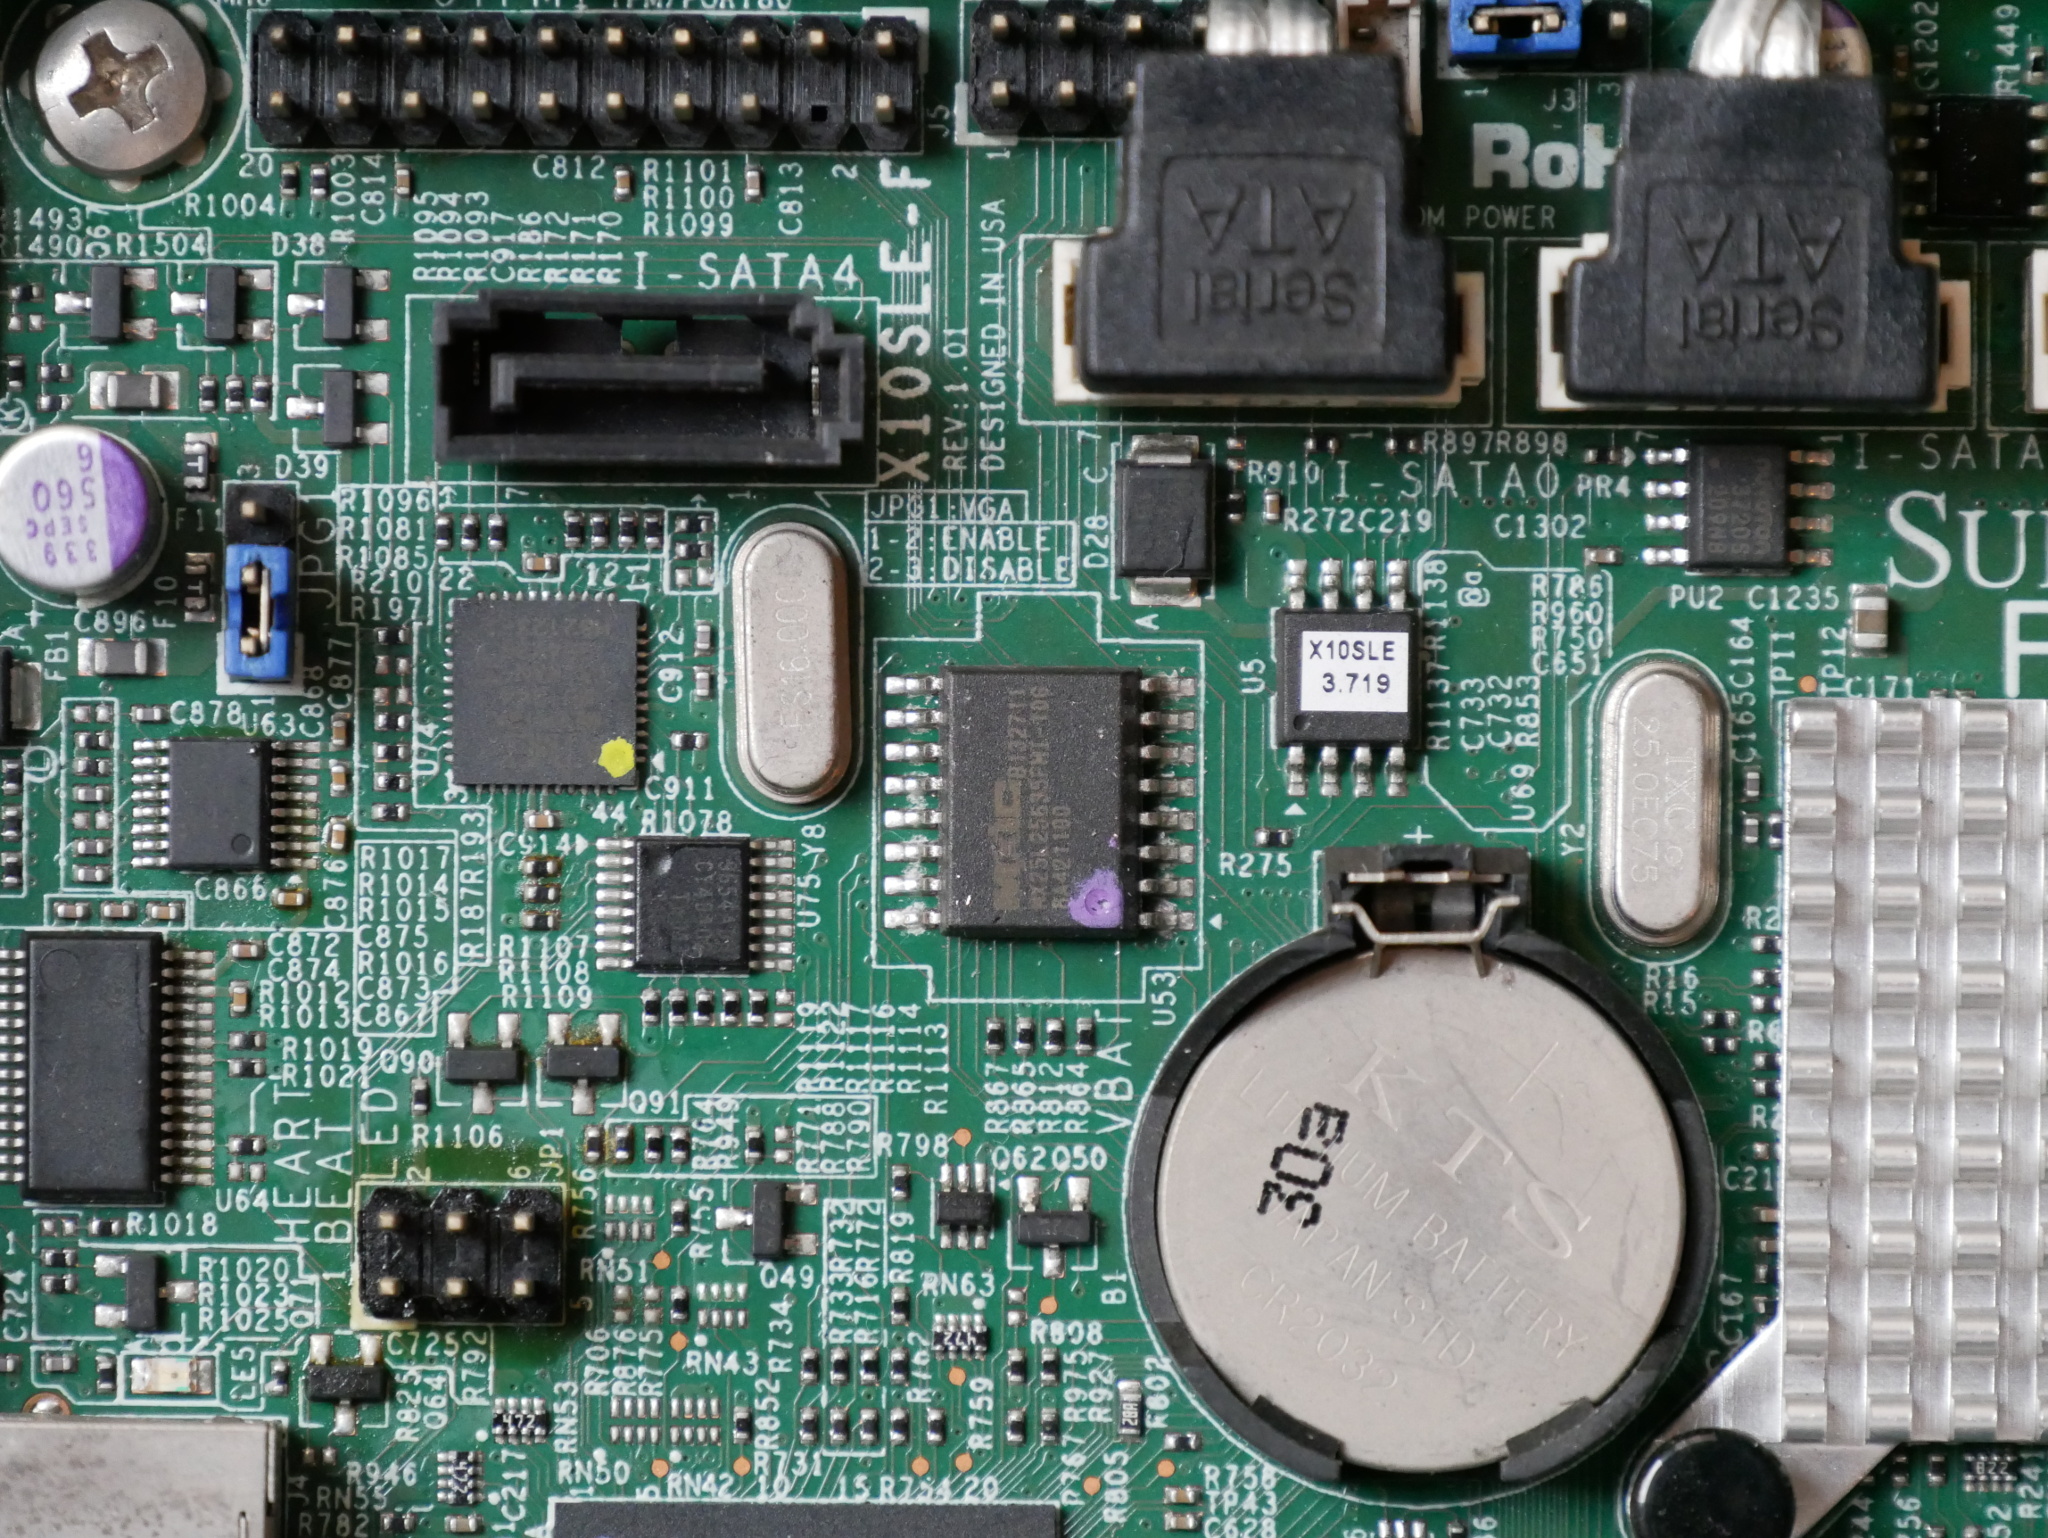
Usually blade servers have very little IO onboard, relying on the chassis backplane to provide power and communication. In the case of Supermicro, the Micro Cloud series (such as the Supermicro X10SLE-F) are designed to be used in a chassis providing cooling and power, but they have all other IO onboard. Each node has IPMI, Gigabit Ethernet, VGA/RS-232/USB 2 (SUVI cable), USB 3 (onboard), and SATA connections for up to 5 hard drives.

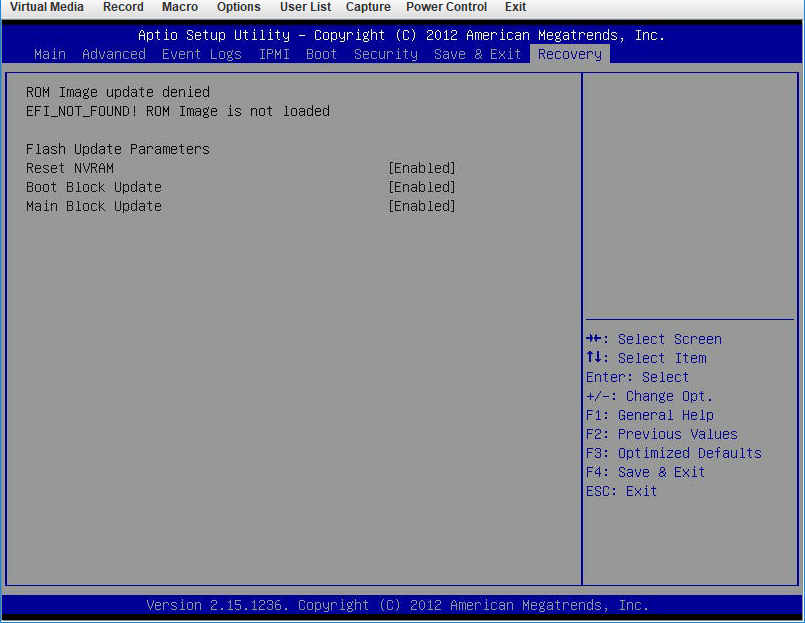
I previously wrote about resetting the IPMI password on the X10SLE-F, which allows you to reset the IPMI to factory defaults (as most eBay sellers don’t know the credentials and/or don’t reset IPMI before shipping). With functional IPMI, you can install an OS without needing the proprietary KVM/SUVI cable from SuperMicro.

There are a few unique aspects to the X10SLE-F I want to discuss, having had one for several months:

  1. It is quite easy to power
  2. Remarkably low power

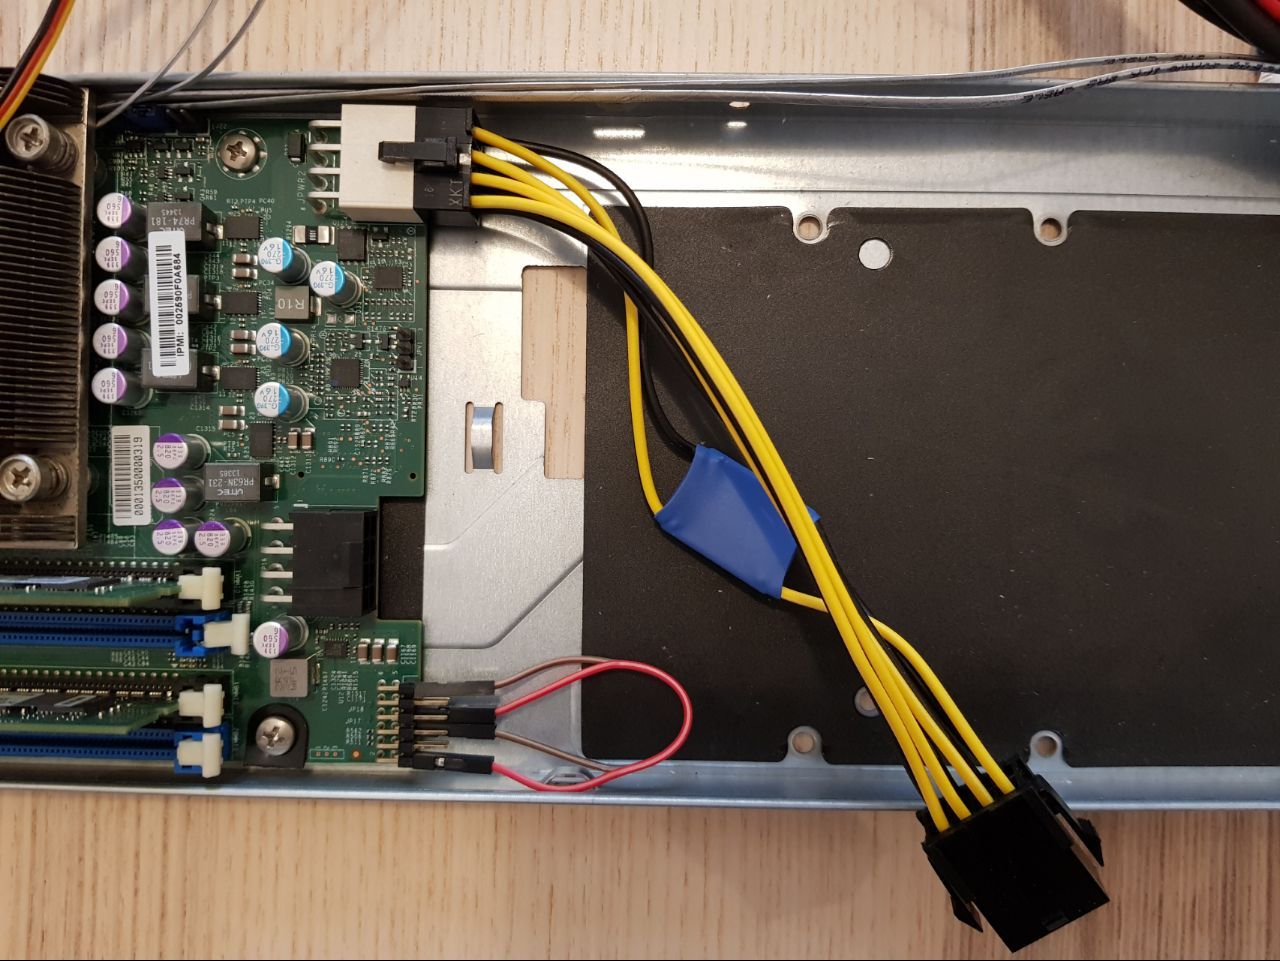
The power connector on the motherboard is the same physical connector as the standard ATX 12V EPS (8-pin CPU) connector. Pin 5 must be replaced with 5V stand-by. The easiest method is to buy an EPS extension cable and modify the extension cable, with that you can use a normal ATX power supply with EPS output to power the board.

In addition to 5VSB and 12V, there are two pin headers on the motherboard which must be wired to signal that the blade is connected to the backplane. You will need two “dupont” wires of 2.54mm pitch (Arduino/Raspberry PI GPIO style) to wire the following pins between JP17 & JP18:

  • Purple: JP18 pin 1 (5V) -> JP17 pin 2 (GND)
  • Green: JP18 pin 6 (3.3V) -> JP17 pin 5

Additionally, your board must be running a BMC version older than 3.38 as SuperMicro changed the backplane detection method in newer BMC releases. Updating to BMC 3.38 or newer will result in the board not powering up. BMC firmware versions above 3.00 include an HTML5 iKVM viewer instead of the traditional Java-based iKVM applet. Here is an archive of SuperMicro BMC firmware releases.

In total, with no modification to the motherboard, 2 breadboard cables and an EPS extension cable, you can use the X10SLE-F by itself without the chassis:

Power consumption is very low. I measured 13W idle on a system with the following specs:

  • Intel Xeon E3-1220v3
  • 2x4GB PC3-10600E
  • SATA SSD (OpenWrt x86)

At 13W consumption, the BMC booted and 2 Ethernet connections are active (BMC and one Gigabit Ethernet).

The BMC alone seems to draw ~6W when booted with the dedicated BMC Ethernet connected. With a high efficiency power supply like the Dell DA-2, the idle consumption of the server will be well under 20W. I have never seen an x86 server idle below 20W, with the Dell R210 II only going as low as 23W with all settings to minimum (CPU speed, memory clock, no iDRAC Ethernet).

Using a CPU such as the Intel E3-1220L V3, you could easily power this board with a 12V power source that can supply 40W. For higher TDP CPUs like the E3-1225 V3, I would recommend a 12V power supply of at least 100W.

The X10SLE-F supports Xeon processors and ECC memory, making it a great low-power NAS for up to 5 hard drives. With up to 32GB of DDR3 ECC and a quad-core processor, you can run ZFS or have a low-power hypervisor.


There’s a thread on ServeTheHome about this motherboard if you have any further questions.

Resetting Supermicro X10 series BMC to factory defaults

If you’ve ever bought a used Supermicro motherboard and it came without the IPMI login reset to ADMIN/ADMIN, you may be wondering how you can reset IPMI to factory defaults without booting an OS.

Quick note before we continue: if you have an OS on the board, and have installed the IPMI tools for your OS, it’s easier to reset the IPMI username/password via those utilities than via the following method.

This method requires physical access and an SPI programmer like the ch341a or Raspberry Pi. A SOIC16 chip clip will also make life much easier. The ch341a and SOIC16 chip clip can be purchased online for <$10 USD from various sources (e.g. eBay, AliExpress).

Disclaimer: This information is provided without any warranty. Always take multiple physical backups of firmware before performing any modifications. I have only tested this on the Supermicro X10SLE-F motherboard as it is the only Supermicro board I own. However, looking at the REDFISH BMC update image available on Supermicro’s website, this method should be compatible with all X10 series motherboard BMC firmware.

To start, we need to locate the BMC flash. On my X10 board, this is an SOIC16 chip from MXIC with a capacity of 32MB (256MBit).

U53 (SOIC16, 256MBit) contains the BMC firmware, U5 (SOIC8, 128MBit) contains the BIOS

Dump the contents of the BMC firmware using flashrom (using ch341a_spi):

$ flashrom -p ch341a_spi -r BMC.bin

I always dump the flash twice and compare the dumps using a hashing algorithm like sha1 or sha256, to confirm that both dumps are identical.

If they are not identical, check your physical connection to the chip and whether something on the board is receiving power from your SPI programmer.

Using binwalk, find the JFFS2 region. In Supermicro X10 firmwares, this appears to be from 0x100000 to 0x400000:

$ binwalk BMC.bin
DECIMAL       HEXADECIMAL     DESCRIPTION
--------------------------------------------------------------------------------
109381        0x1AB45         Certificate in DER format (x509 v3), header length: 4, sequence length: 12291
109541        0x1ABE5         Certificate in DER format (x509 v3), header length: 4, sequence length: 12291
109777        0x1ACD1         Certificate in DER format (x509 v3), header length: 4, sequence length: 12291
109913        0x1AD59         Certificate in DER format (x509 v3), header length: 4, sequence length: 12291
110057        0x1ADE9         Certificate in DER format (x509 v3), header length: 4, sequence length: 12291
112368        0x1B6F0         CRC32 polynomial table, little endian
1048576       0x100000        JFFS2 filesystem, little endian
4194304       0x400000        CramFS filesystem, little endian, size: 11915264 version 2 sorted_dirs CRC 0xD6771DEA, edition 0, 6818 blocks, 1038 files
20971520      0x1400000       uImage header, header size: 64 bytes, header CRC: 0xC5F4666A, created: 2015-10-05 10:52:56, image size: 1537322 bytes, Data Address: 0x40008000, Entry Point: 0x40008000, data CRC: 0x677BDAA8, OS: Linux, CPU: ARM, image type: OS Kernel Image, compression type: gzip, image name: "21400000"
20971584      0x1400040       gzip compressed data, maximum compression, has original file name: "linux.bin", from Unix, last modified: 2015-10-05 10:49:39
24117248      0x1700000       CramFS filesystem, little endian, size: 5435392 version 2 sorted_dirs CRC 0x43329740, edition 0, 2071 blocks, 309 files

To reset to factory defaults, simply overwrite the JFFS2 region with 0:

$ dd if=/dev/zero of=BMC.bin bs=1 seek=1048576 count=3145728 conv=notrunc

Reflash the modified firmware:

$ flashrom -p ch341a_spi -w BMC.bin

When you power up the board again, the BMC will re-create the JFFS2 region with the default credentials of ADMIN/ADMIN.

Editing the JFFS2 partition instead of overwriting it with zeros seems to invalidate a checksum somewhere, and this causes the BMC to re-initialize the JFFS2 region on the next boot. For that reason, I wouldn’t recommend extracting and editing the JFFS2 region, just zero it out.

Note: you will lose any licensed features in the BMC by resetting it to defaults using this method. However, Peter Kleissner did an amazing job reverse engineering the Supermicro license validation code, and using his work you can generate an IPMI license for your BMC.

With the licensed BIOS upgrade feature of IPMI, you can update the BIOS without ever needing to boot an OS, very handy for when your CPU revision is unsupported by an old BIOS release or if the board happens to have a corrupt BIOS image.

It should also be noted that the Supermicro BIOS updates available from their website appear to be directly flashable to SPI. You’ll lose some SMBIOS information if you use an SPI programmer to write directly to the SOIC8 containing the BIOS, but it can also help resolve some strange issues encountered after the IPMI BIOS upgrade (example below).

I hope this information is useful to anyone trying to get into their Supermicro BMC. Of course, requiring physical access and an SPI programmer is never as easy as resetting the BMC passwords from software and carries some risk that you may corrupt the BMC firmware.


There’s a thread on ServeTheHome about this motherboard if you have any further questions.