Using proprietary OEM motherboards outside their intended use case is not a new subject. OEM motherboards are typically less expensive than their enthusiast counterparts on the second hand market, and they often incorporate features that the enthusiast offers lack, such as an integrated TPM or additional I/O.
The HP Z420 is a workstation based on the LGA 2011 (Sandy/Ivy Bridge-EP) socket, released in 2012. There are various forum threads around the internet discussing how to operate the motherboard with a third-party power supply and chassis, however I have not found a succinct document that outlines all the steps required to use the motherboard without HP original parts.
The motherboard has an 18+8pin power arrangement. The motherboard is almost entirely 12V powered, with +11VSB being the only other voltage present. The pinout of the 18 pin main power connector is as follows:
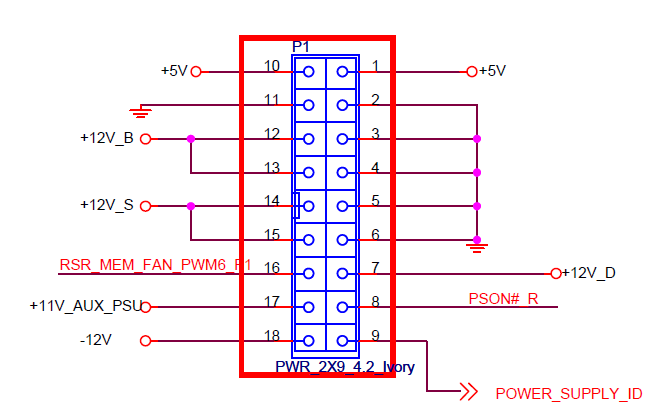
The following pins are the only pins required to power the motherboard:
| Z420 Pin | Description | ATX PSU pin |
| 1, 10 | 5V output from the motherboard | N/A |
| 2-6, 11 | Ground | 3, 5, 7, 15, 17-19, 24 |
| 7, 12-15 | 12V input | 10-11 |
| 8 | /PSON | 16 |
| 17 | +11VSB input | N/A (step-up from +5VSB) |
| 18 | -12V input (not required) | N/A |
It is possible to inexpensively build an adapter out of a 24 pin ATX extension table and a DC buck-boost converter to step +5VSB up to +11VSB. You can also find very inexpensive adapters for sale on eBay or AliExpress which are purpose built for the Z420/Z620:

These adapters are typically around $5 and include the buck-boost circuit needed to provide +11VSB (located in the black shrink wrap mid-cable).
The 8 pin power connector on the motherboard is identical to the ATX EPS power connector. However, the EPS power is on a right angle facing the top of the motherboard, you may have clearance issues installing the motherboard into some ATX chassis.
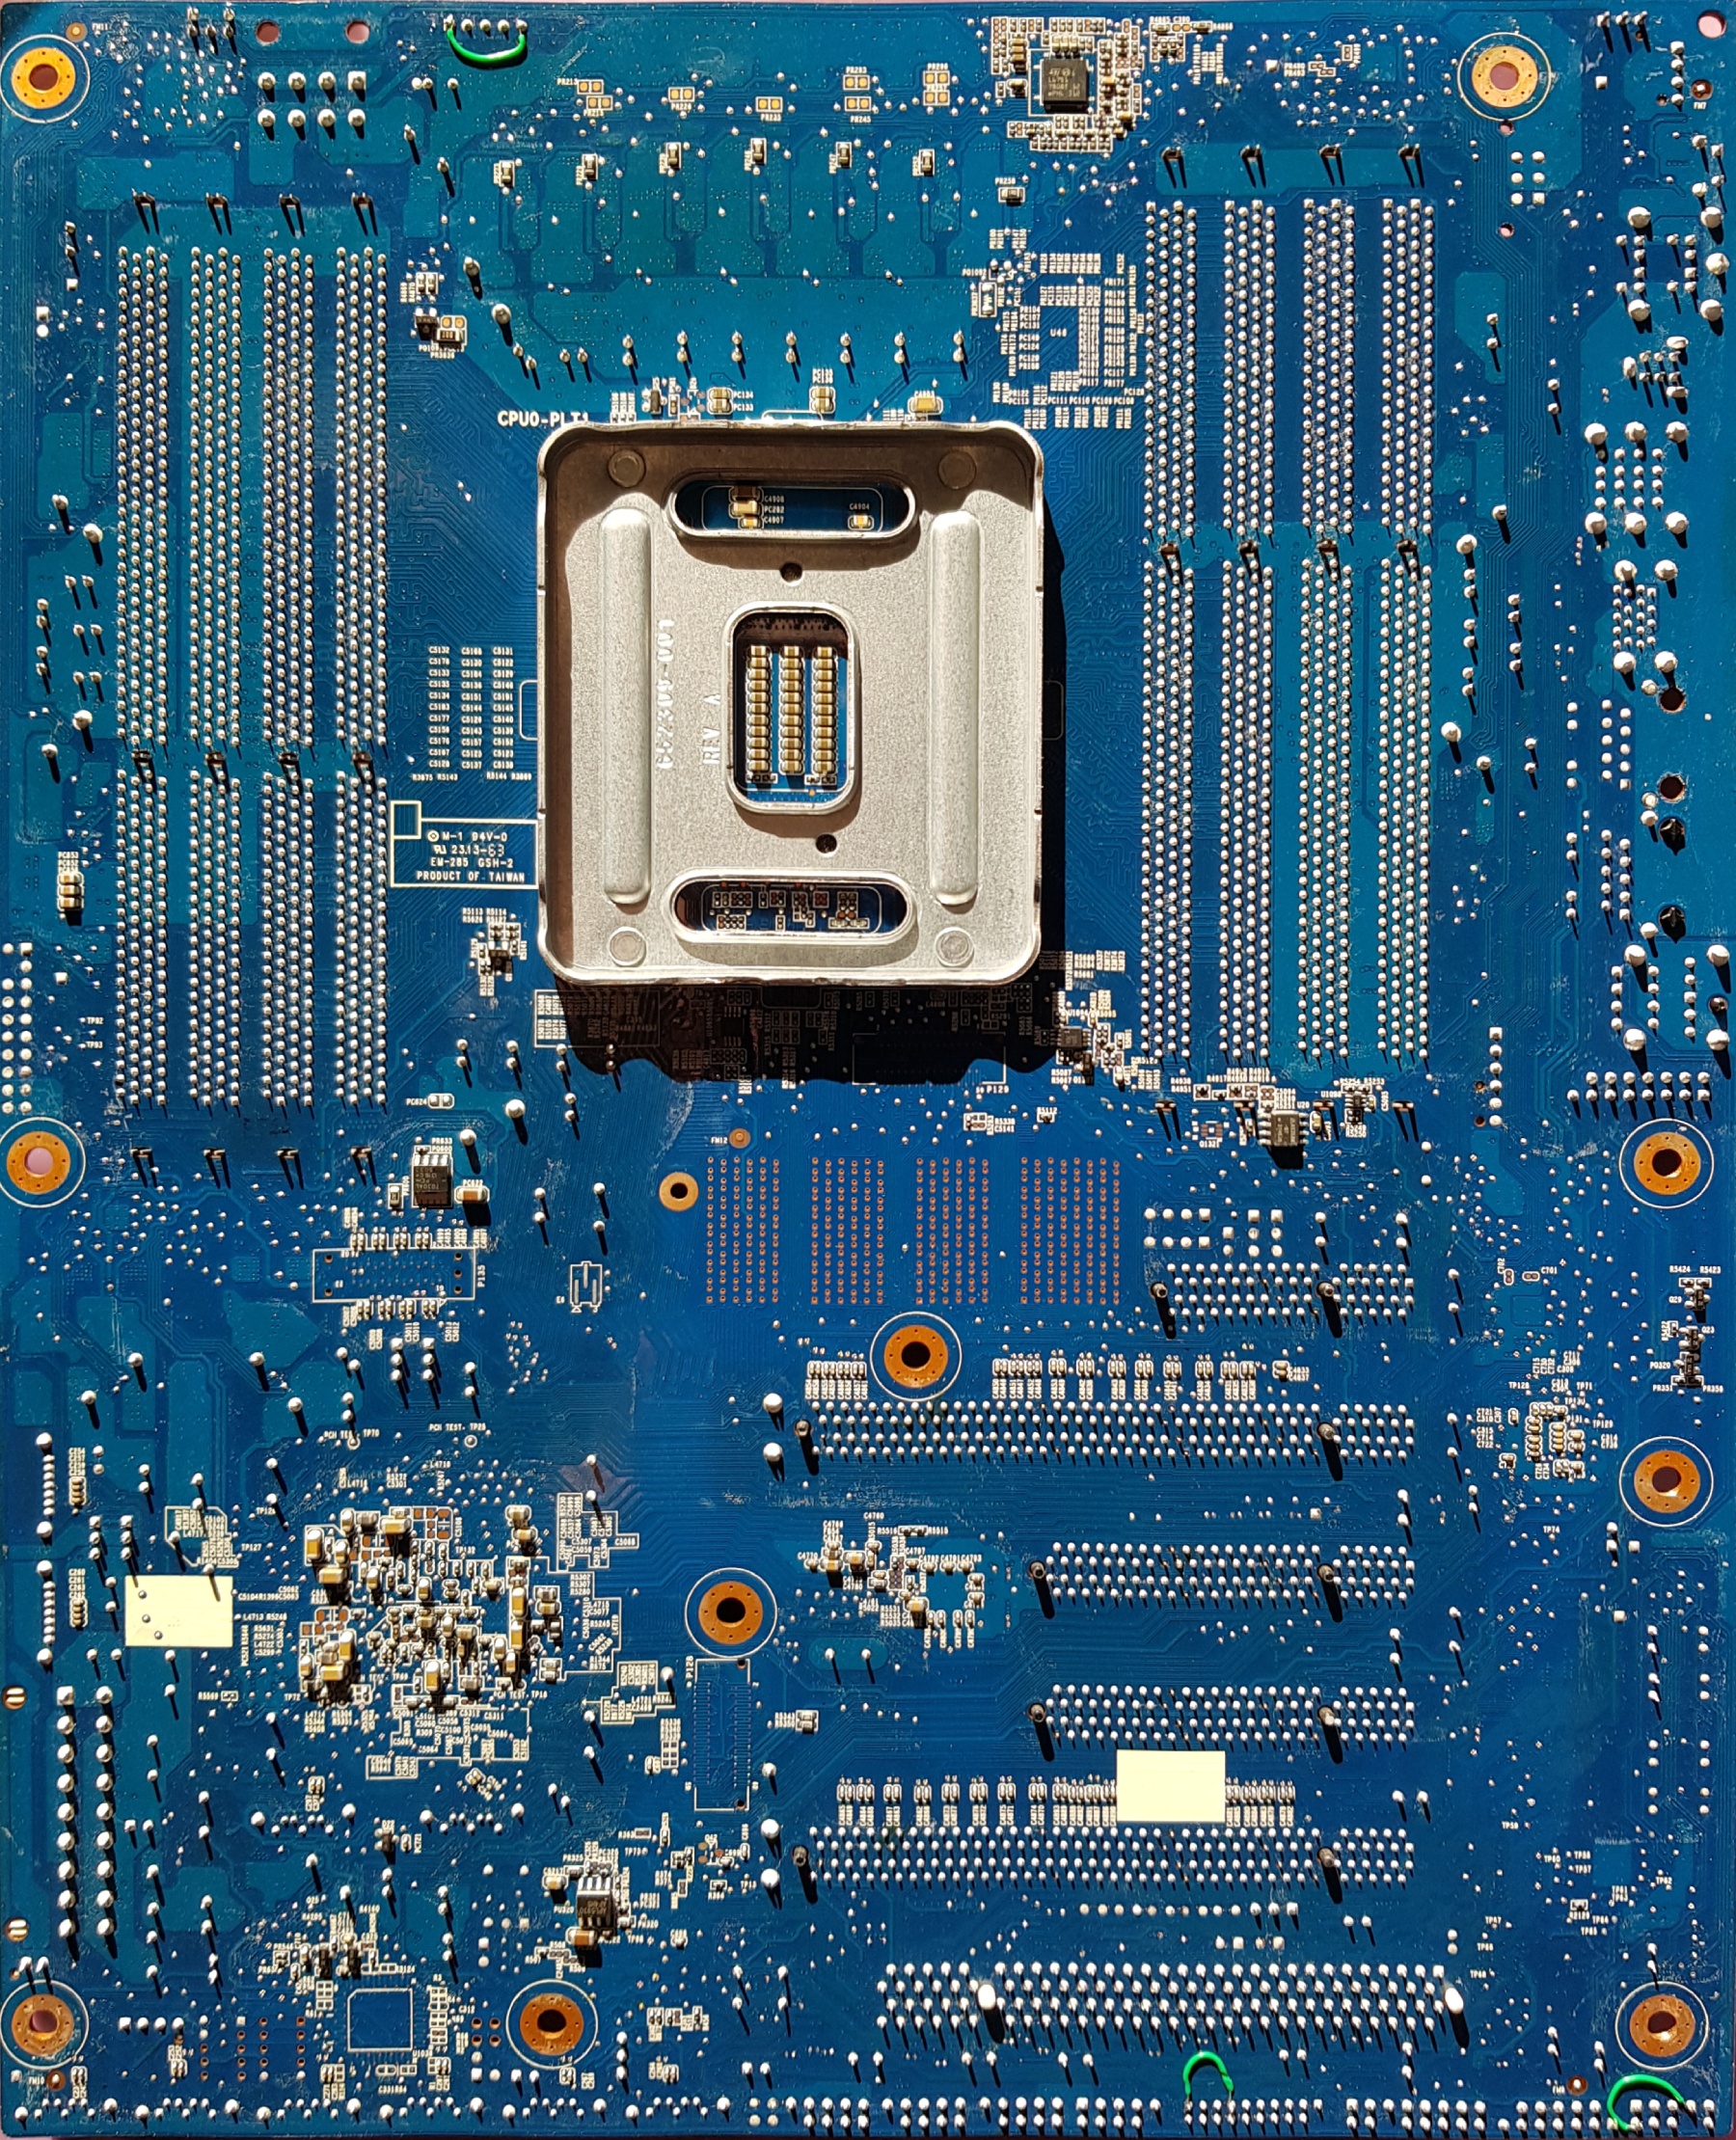
The CPU socket backplate has extrusions which will interfere with your chassis (assuming your chassis does not have a cut-out behind the CPU for accessing the backplate without removing the motherboard). These can be removed by fatiguing the metal (repeated bending using pliers) or with a dremel.
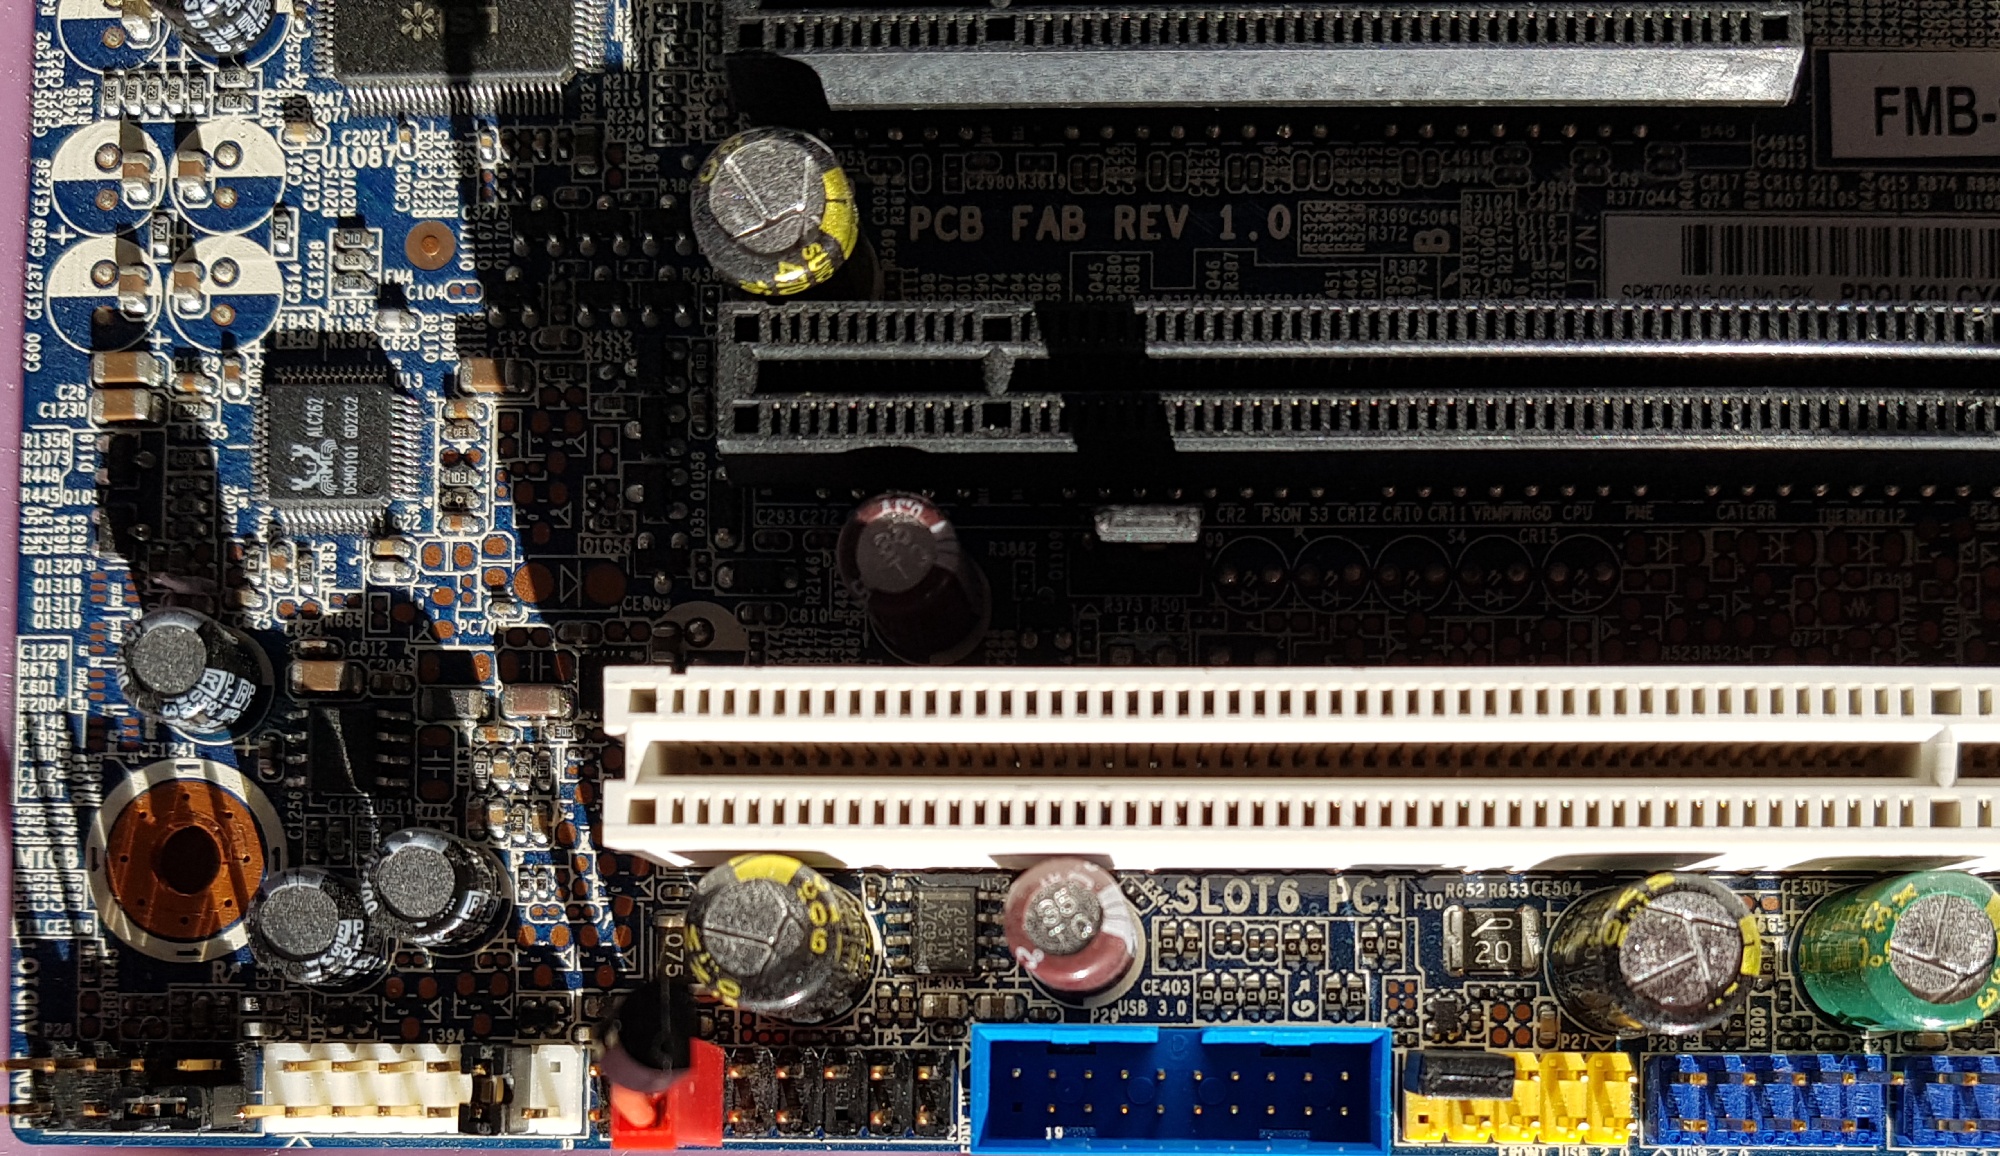
Some other minor modifications are required to convince the motherboard that it is running inside an HP chassis.
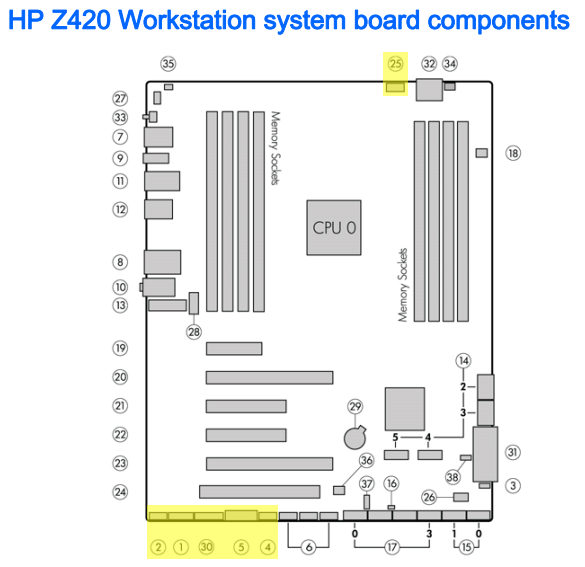
CPU fan (25): Connect pin 1 to pin 5
Front panel audio (2): Connect pin 2 (GND) to pin 4 (presence), since the pins are adjacent you can use a jumper. Connect pin 7 (sense_send) to pin 2 (GND).
Front panel IEEE1394 (1): Connect pin 11 (TPB-) to pin 12 (GND), since the pins are adjacent you can use a jumper.
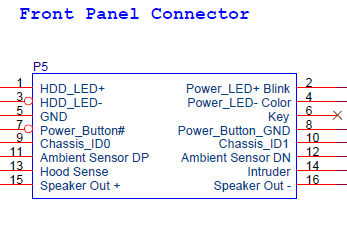
Front panel LEDS (30): Connect pin 11 to Base and Collector of a 2222A NPN transistor, connect pin 12 to the 2222A Emitter.
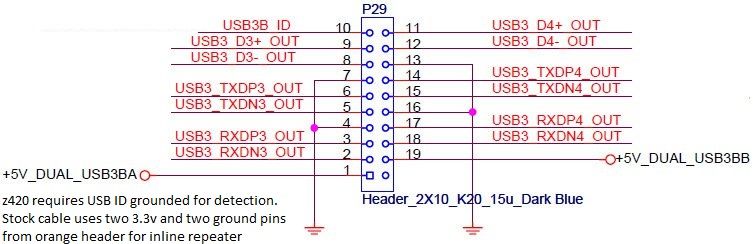
Front panel USB3.0 (5): Connect pin 10 (USB3B_ID) to GND (one of pins 4, 7, 13, 16)
Front panel USB2.0 (4): Connect pin 8 (GND) to pin 10 (DRAIN), since the pins are adjacent you can use a jumper.
A final word on power consumption: the Z420 motherboard consumes around 40W idle (E5-2630v2), but supports ACPI suspend-to-ram (S3) and consumes around 10W when in S3. Wake-on-LAN does not work when using an ATX power supply.
The Z210 motherboard also has the same power supply pinout as the Z420 18-pin PSU connector, and uses a P4 power connector for CPU power.
The Z210 heat sink mounting holes are 100mm x 70mm (note: this is a non-standard size, you should probably use HP’s heat sink).
Can’t img in a comment so here’s an annotated diagram: https://watchmysys.com/blog/wp-content/uploads/2022/06/HP_Z210_CMT.jpg
Importantly, the Z210 motherboard never received a BIOS/ME firmware update to support Ivy Bridge. ONLY Sandy Bridge CPUs (E3-1200 v1) are supported. The system will not POST with an Ivy Bridge CPU.
Interesting to see something on the z420. Another known capability is that the motherboard will allow ecc reg (RDIMM) memory modules to be used, and even LRDIMMs as I discovered when using a v1 xeon like the e5-2630L. In this configuration, 32GB LRDIMM modules will allow you to stuff 256GB of ram in this unit as I’ve done and it memtested fine.
Now that z440/z640 mb’s are coming down in price, have you considered those as possible candidates for cheap upgrades and possible lower power bills?
I wouldn’t recommend anyone build a platform around the Z420 in 2022, it’s just too old. This post was a draft for years that I finally got around to polishing enough to publish.
I will probably not do anything with the Z440/Z640 since they’re also quite dated, any modern Zen3/4 CPU will easily outperform them and I don’t need the additional memory density that you get with Reg ECC.
Thank you very much for posing this though, I bought 3 of these and had no idea where to start on getting them functional and this guide has been a lifesaver. Especially the jumper placement and power switch pinout.
Any ideas how I can fool the motherboard into thinking the other fans are in place? I assume that its just a case of connecting pins in the plugs that same as the CPU fan, but I’m not sure which
Sorry, but I don’t own this motherboard anymore. If you figure it out please let us know 🙂