When we left off in my last post about the Western Digital EX2100, I had corrupted the firmware on the microcontroller responsible for managing mundane system tasks like bringing the main ARM SoC out of reset. This unfortunate bout of curiosity had left me with a fancy brick instead of a NAS.
To recap from the last article, the EX2100 uses a Weltrend WT61P8 series MCU (despite being labelled WT69P803) intended for use in flatpanel televisions. The WT61P8 has a turbo 8052 CPU and is primarily intended for flatpanel television power management as it supports HDMI CEC and Infrared.
Finding the ISP
Consulting the WT61P8 datasheet (PDF) I was able to trace the headers JP3 and JP4 on the EX2100 PCB:
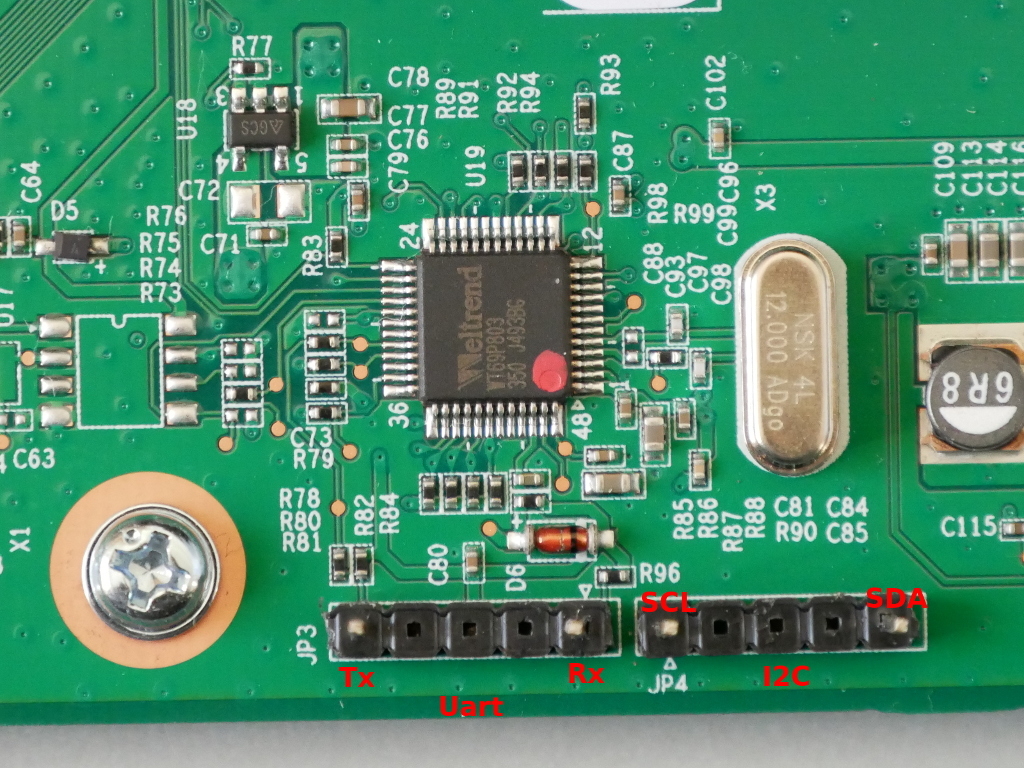
JP3:

Pin 1: Uart Tx (WT61P8 pin 32)

Pin 5: Uart Rx (WT61P8 pin 31)
JP4:
Pin 1: SCL (WT61P8 pin 23)
Pin 5: SDA (WT61P8 pin 22)
If I can be grateful for one thing, it is that this microcontroller is frequently used in Samsung televisions and Russians are very resourceful at repairing and modifying televisions. Through a variety of Russian language forums and with a lot of Google translate, I was able to find that the WT61P8 supports ISP via I2C and that there is software available to flash it. The “Postal2” software is designed for dumping and flashing firmware from televisions, and as the WT61P8 is used in televisions it is supported.
Now my options were either:
- Postal2, which is intended to be used with a parallel port to I2C adapter
- RT809F ISP programmer, which costs around $70
Since I did not really want to spend money on the RT809F, having no other use for it, I decided to try Postal2.
A trip back to the 1970s
However I faced a problem: Postal2 requires an LPT to I2C adapter, and this is not an adapter you’ll find anyone selling on AliExpress or eBay, so I would have to make it myself.
After searching for schematics, and building one non-functional adapter, I was able to find a correct schematic for an LPT to I2C adapter that people were successfully using with Postal2:
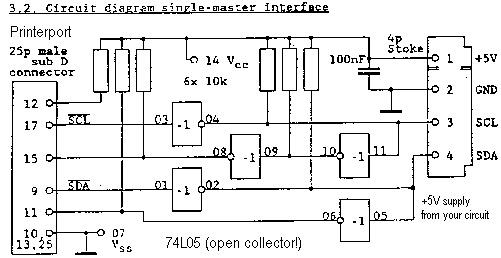
Use 3.3V instead of 5V as the WT61P8 operates at 3.3V
Luckily I already had some CMOS inverters from another project, so I only had to order resistors and an LPT connector. After much soldering, and a trip down nostalgia lane to another era of computing, I finished the adapter:
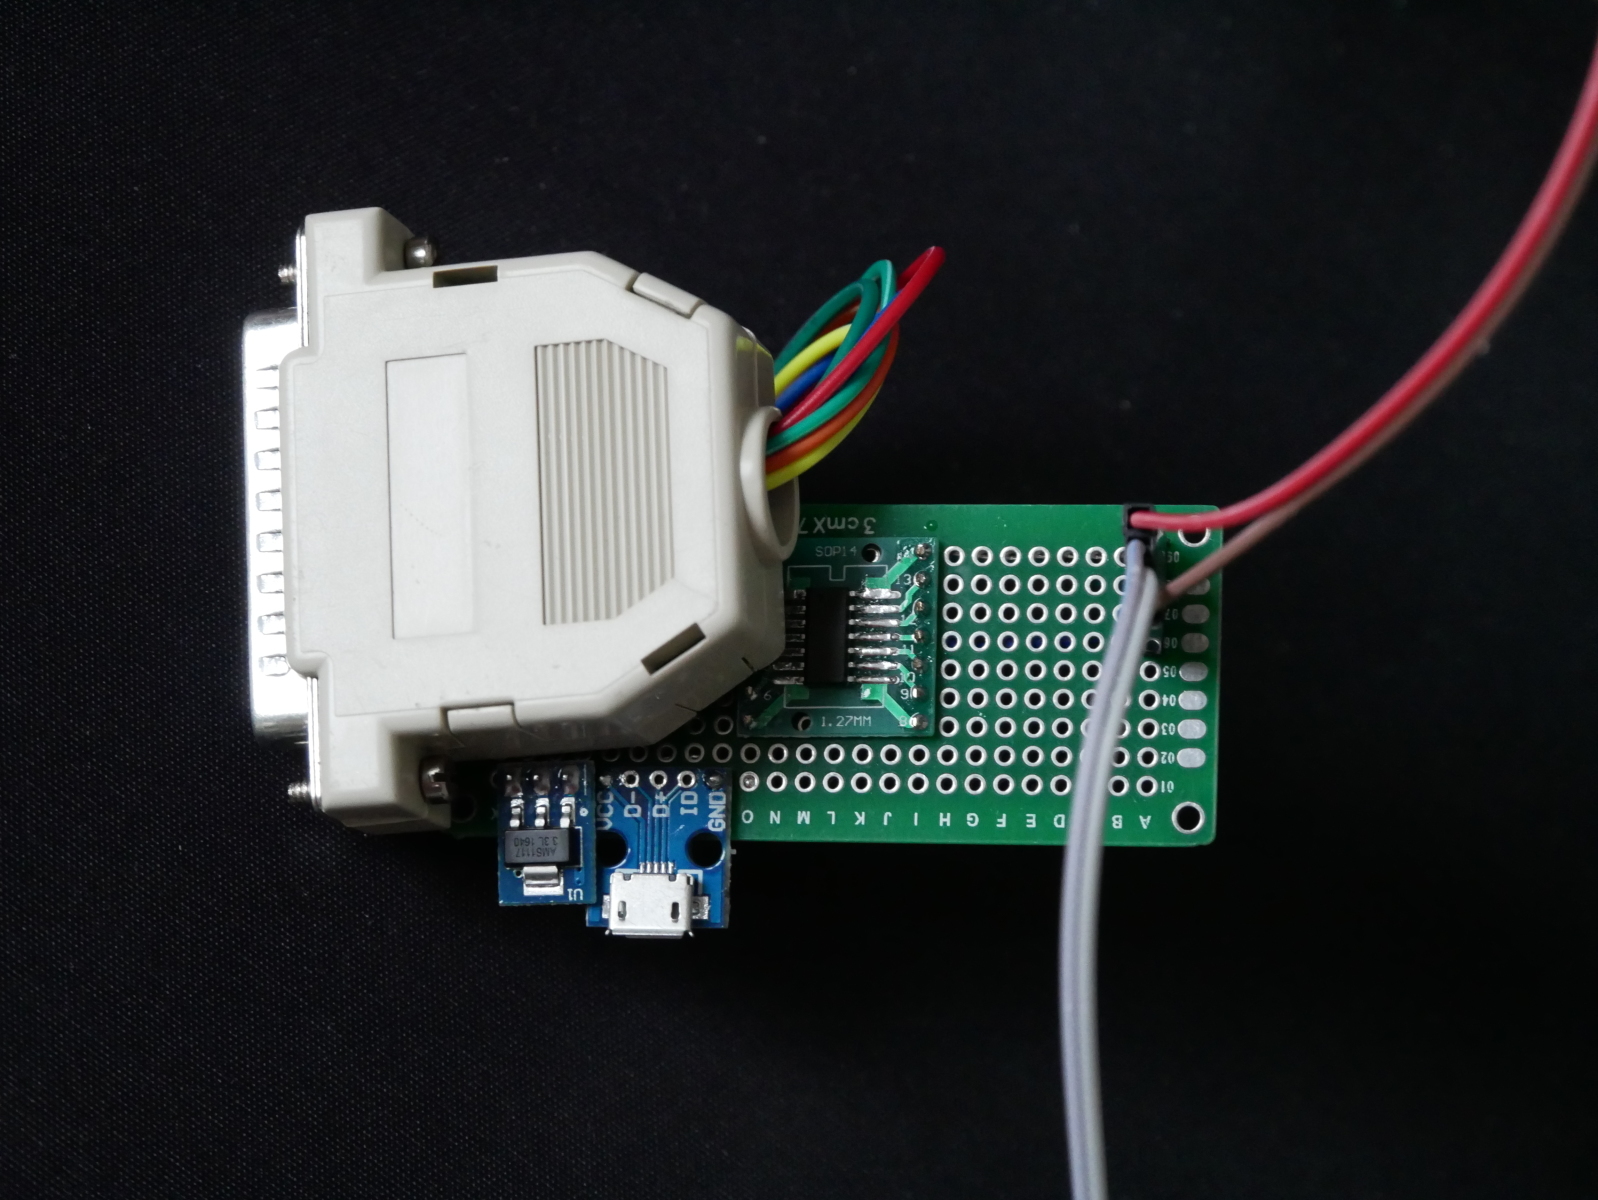
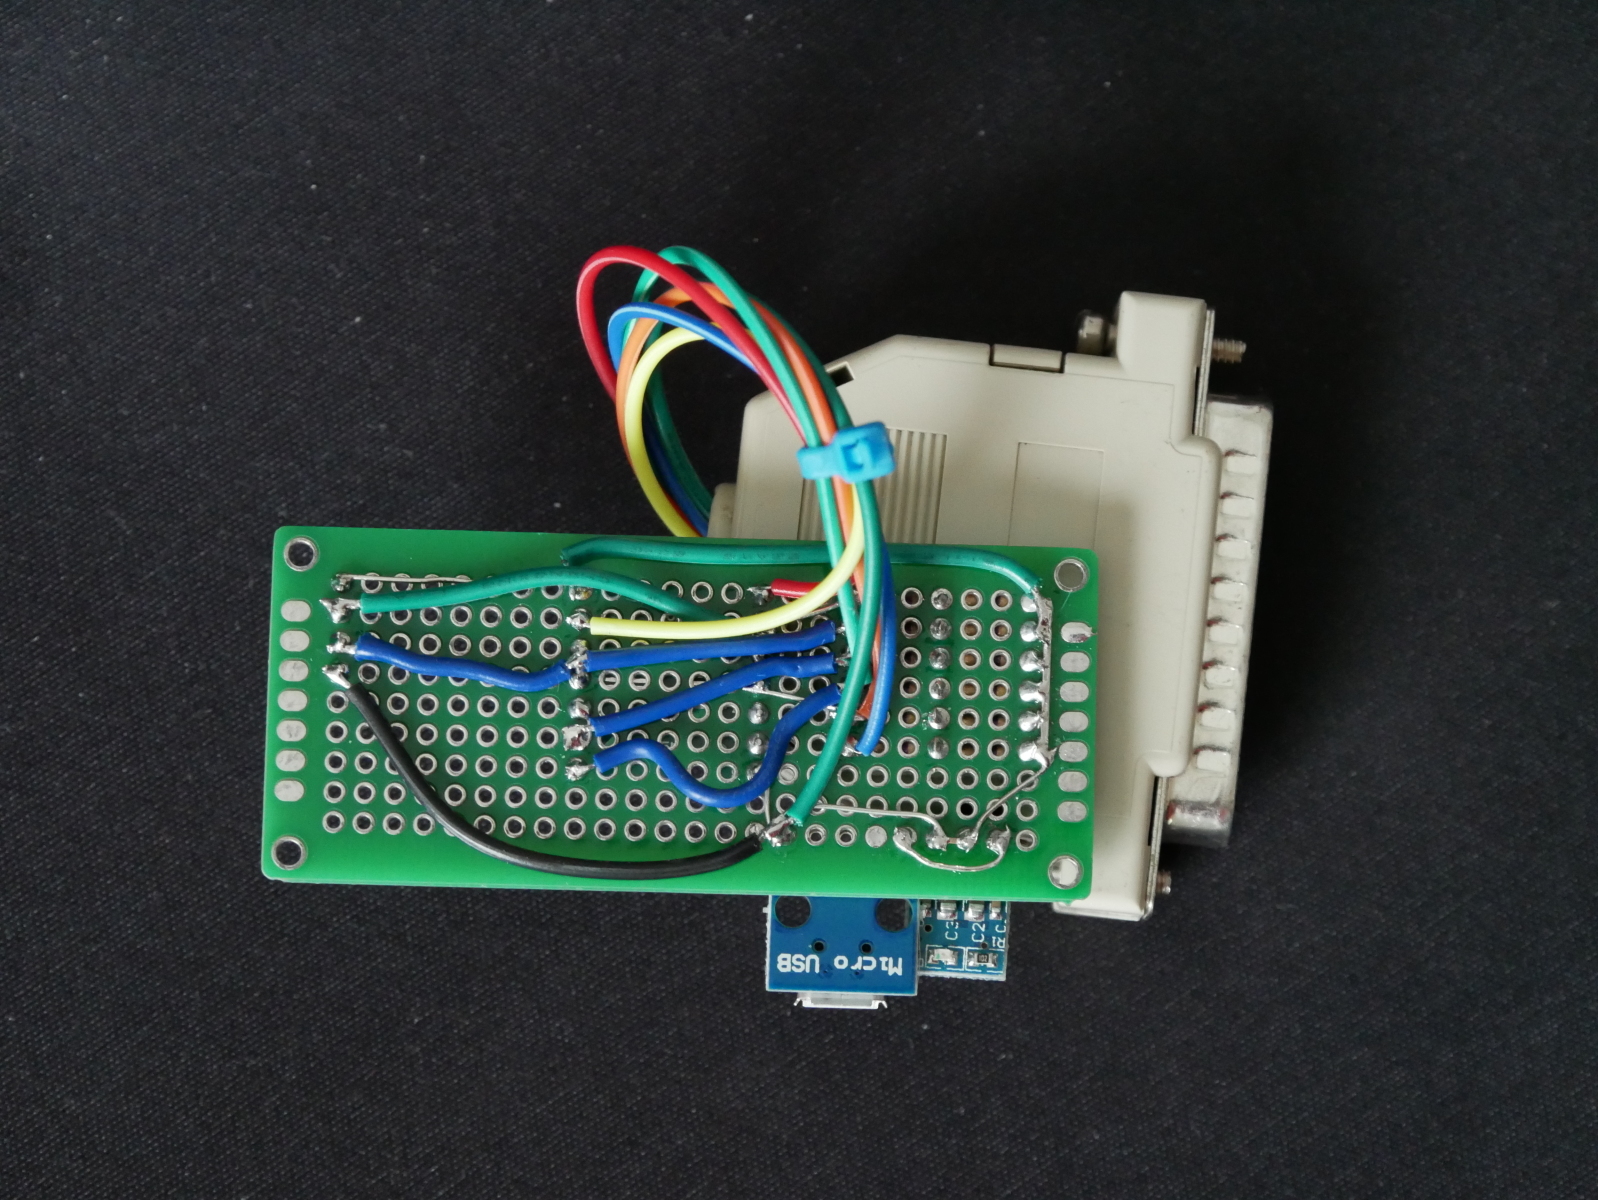
The micro USB port is for power, with a 5V to 3.3V linear regulator. An equal mix of modern and ancient connectors are present in this adapter.
Then I had to find a PC with a parallel port and install Windows 7 x86. Postal2 seems to be completely incompatible with all x64 versions of Windows.
Finally finished with the prerequisite tasks, I started Postal2 and tried to read the current EEPROM contents from the Weltrend using the SDA/SCL lines on JP4 within the EX2100:
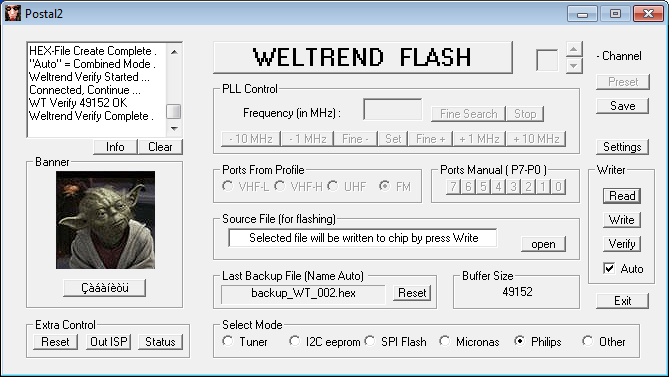
It works!
Examining the downloaded firmware with the firmware file I managed to save from the EX2100 as it was updating, it was clear to me what had happened:
After analyzing the downloaded firmware, it appears mcu_upgrade put the Weltrend into ISP mode and erased a majority of the internal EEPROM, leaving [I assume] only the bootloader. For some reason, mcu_upgrade did not write the firmware back to the Weltrend after erasing. I won’t speculate if my strace on mcu_upgrade was responsible for it… When I reset the EX2100 the Weltrend had no firmware to run, and didn’t bring the main Armada CPU out of reset, resulting in a brick.
Since the bootloader portion of the firmware I dumped and the binary firmware I had from the EX2100 update were the same, I felt confident to upload the firmware binary to the Weltrend using Postal2. My logic: cannot be any more broken than it is now ¯\_(ツ)_/¯
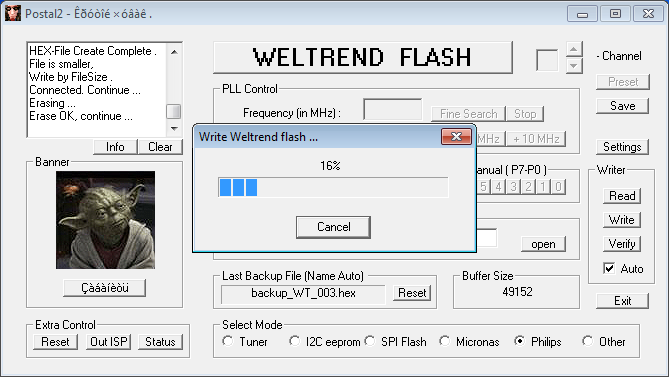
I would not consider the result a complete success. The Weltrend did have a valid firmware again, and it was functional enough to bring the main Armada CPU out of reset. Unfortunately (or predictably) the binary firmware I recovered from the Western Digital update package does not appear to be specifically for the EX2100.
Here is the uart output of the Weltrend during boot before I bricked it:
Yosemite Uart test

nick 2222

nick pwr on

Check_SYSTEM_Command=11

PwrOnCause=10
And here is the uart output after flashing the uP_0.bin I extracted from the EX2100 update archive:
nick 4444

Check_SYSTEM_Command=11

PwrOnCause=00

nick pwr off wol
The codename for the EX2100 is “Yosemite” and unfortunately this string does not exist in the binary firmware uP_0.bin I extracted from the EX2100 firmware update. Looking at the strings in the firmware, it appears that the firmware is intended for the “MyCloudDL2000” (a product that doesn’t exist). There is a DL2100 which is a “Pro” version of the EX2100, using an Intel CPU instead of the Marvell Armada.
Unfortunately the behaviour of the Weltrend with the extracted firmware is different enough that u-boot hangs trying to configure wake-on-LAN for the two Ethernet interfaces. Since u-boot doesn’t get far enough to boot Linux, my next task was stripping out all communication with the Weltrend from the u-boot source to see if I could at least get the NAS to boot Linux.
After building u-boot with WoL configuration disabled, I was able to kwboot u-boot and successfully boot into the Western Digital firmware.
In another stroke of luck, Western Digital has published a new firmware (2.30.181) to resolve a vulnerability discovered in their web management interface. Updating the Western Digital firmware on my EX2100 also updated the firmware on the Weltrend. The firmware update process resolved the issue with u-boot WoL and I had a fully functional unit again.
Obtaining the Weltrend firmware
I was mystified where the firmware from the Weltrend microcontroller came from. There is no file matching the contents of “uP.bin” or “uP_0.bin” in the filesystem of the firmware update, nor is there any firmware blob in the WD GPL archive that I could find.
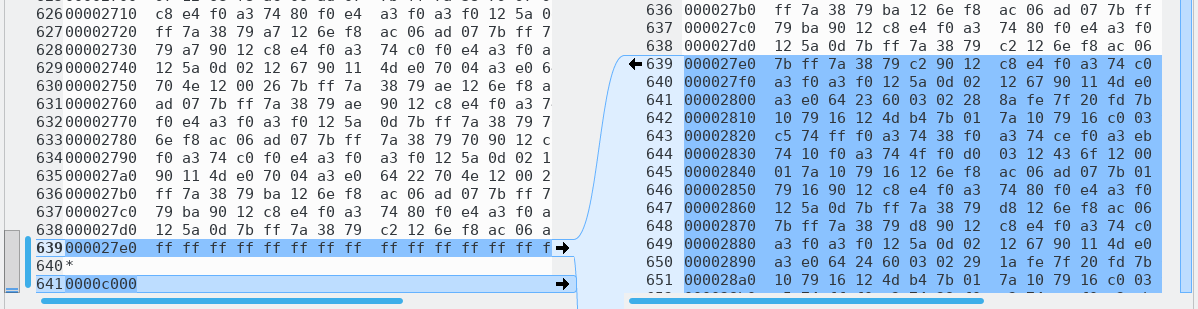
After much searching in the squashfs filesystem of the update, and through the WD GPL archive, I finally gave up and grepped for a hex string in the firmware in the firmware update binary itself. At this point I was very surprised to find that the Weltrend firmware is simply appended to the end of the WD firmware update.
The firmware is under 50KB, as the size of the flash in the WT61P803 is only 49152 bytes. Chopping the last 50KB of the firmware update file with dd allows you to easily find the offset of the Weltrend firmware with hexdump and grep. The firmware starts with 02 5d a9 which is a long jump to address 0x5da9:
hexdump -C data.bin | grep 02 5d a9
With the offset from hexdump, you can again chop the file with dd to isolate only the Weltrend firmware. There doesn’t appear to be any data in the firmware update file after the Weltrend firmware, so there’s no need to remove any trailing data.
Firmware analysis
I was interested in reverse engineering the Weltrend firmware to determine what tasks it was performing. I know that the Weltrend is responsible for at least:
- System power to internal components (Armada CPU, system fan)
- Enabling or disabling SATA hard drive power
- Reading the ambient temperature sensor
- Controlling the system fan speed (PWM controlled)
- Power LED (colour, blink rate)
I asked a friend with IDA Pro to disassemble the binary to see if it was possible to isolate specific functions that would give insight into the tasks the Weltrend is performing. Unfortunately, IDA didn’t produce anything immediately obvious. But with some searching, we were able to identify some portions of the firmware, such as the UART command reply method:
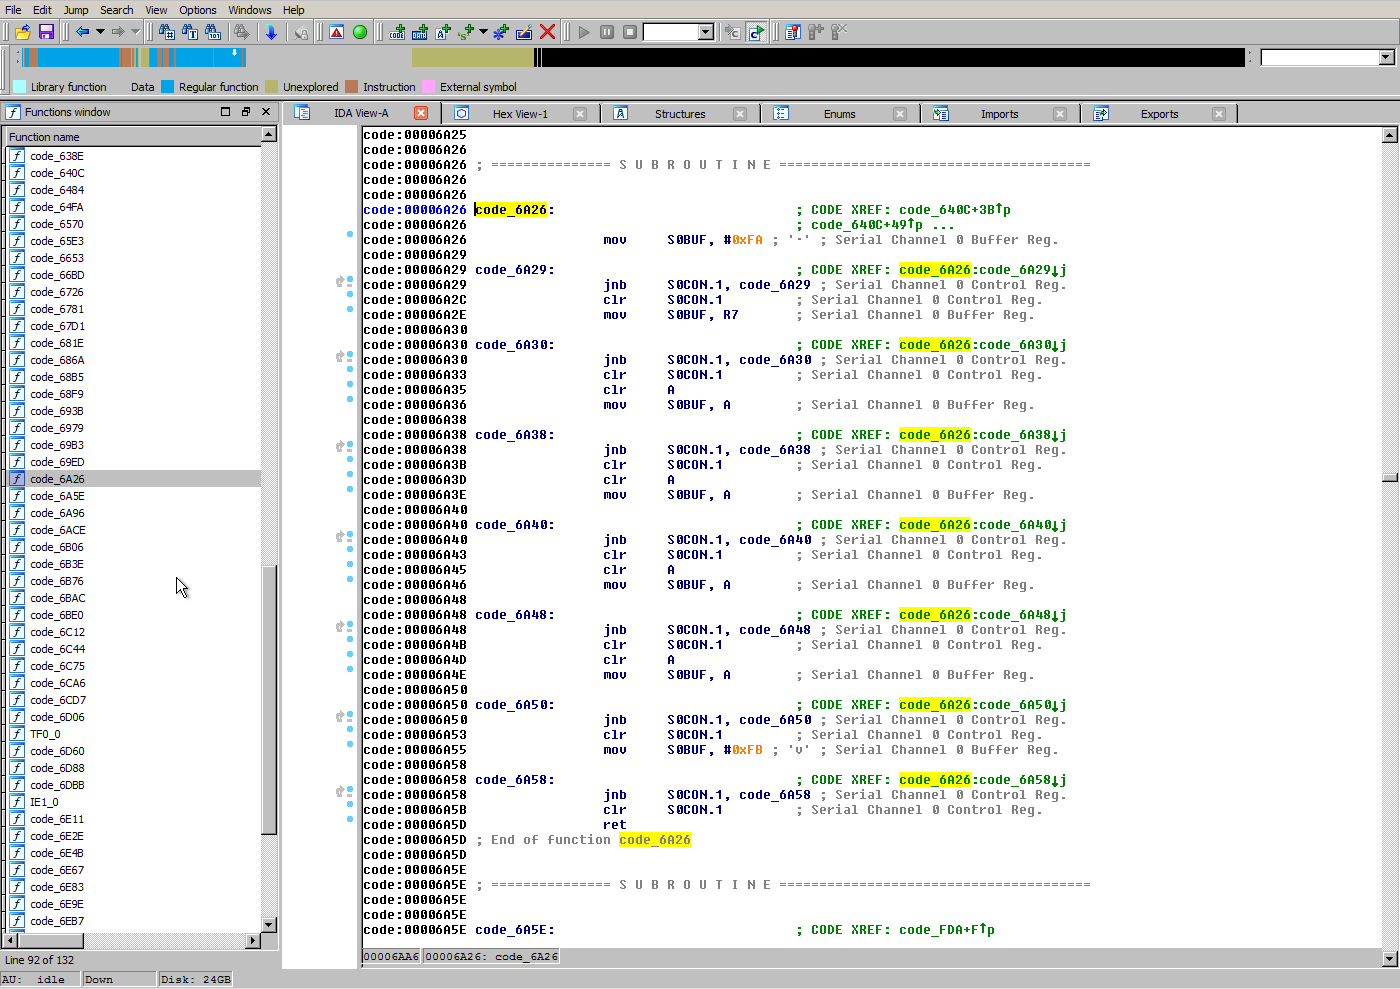
While I dislike an opaque microcontroller being used for important system management functions, I’m not prepared to invest a lot of time in learning 8052 assembly so I can reverse engineer the firmware.
Conclusion
If you have a Western Digital NAS using a Weltrend microcontroller and it appears to be bricked, there is route to recovering the firmware and it’s not as impossible as it may seem at first glance. With access to the SDA/SCL header and an LPT adapter can be built from inexpensive components you can flash the Weltrend firmware extracted from the WD update file.
In the future I think it is best if I stick to the task at hand (writing Debian installation instructions) and refrain from messing with proprietary and undocumented microcontrollers responsible for key system functions like power management.
Stay tuned, installation instructions are coming soon!
Nice day. My name is Wilson
I need to program a WT61P6 I want to use your method. I already made the interface but I couldn’t find the software postal2.es possible provide me with a copy of that program. Thank you. Wilson Velasco