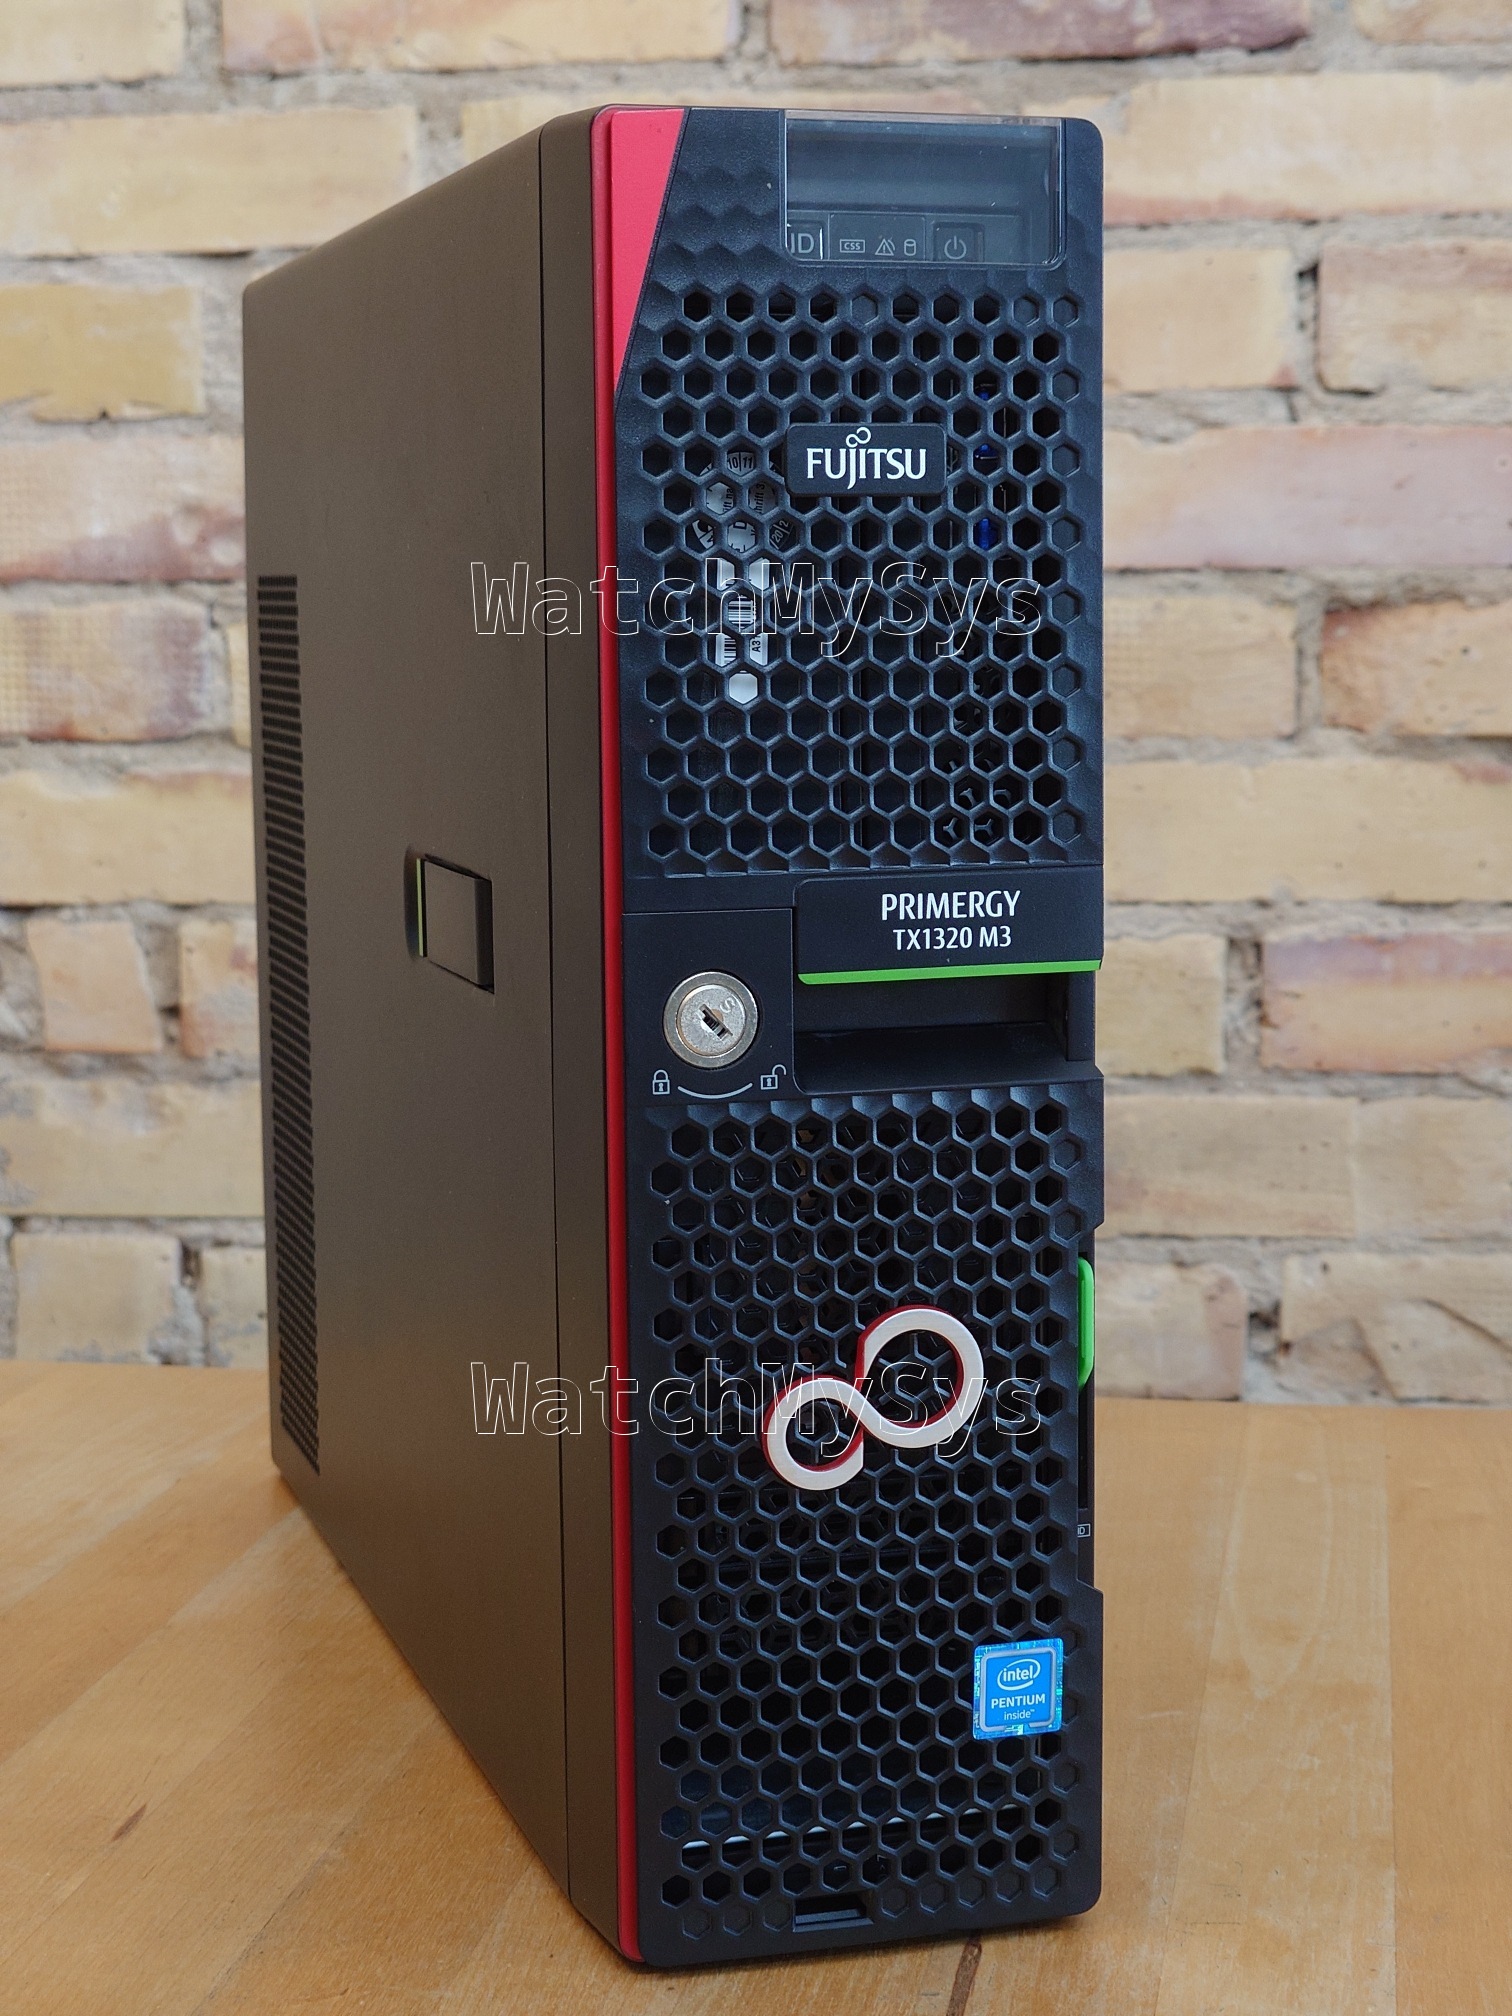
As with many purchases, this one began with a thread on ServeTheHome. Given my previous work on the Fujitsu TX140 S2 motherboard, how could I refuse the offer of a barebones Fujitsu TX1320 M3 for only 29€?
The TX1320 M3 is slightly too tall to fit within 2U, measuring at 398x340x98mm. Those wishing to place it on a rack shelf, you will need to budget 2.5U for the unit.
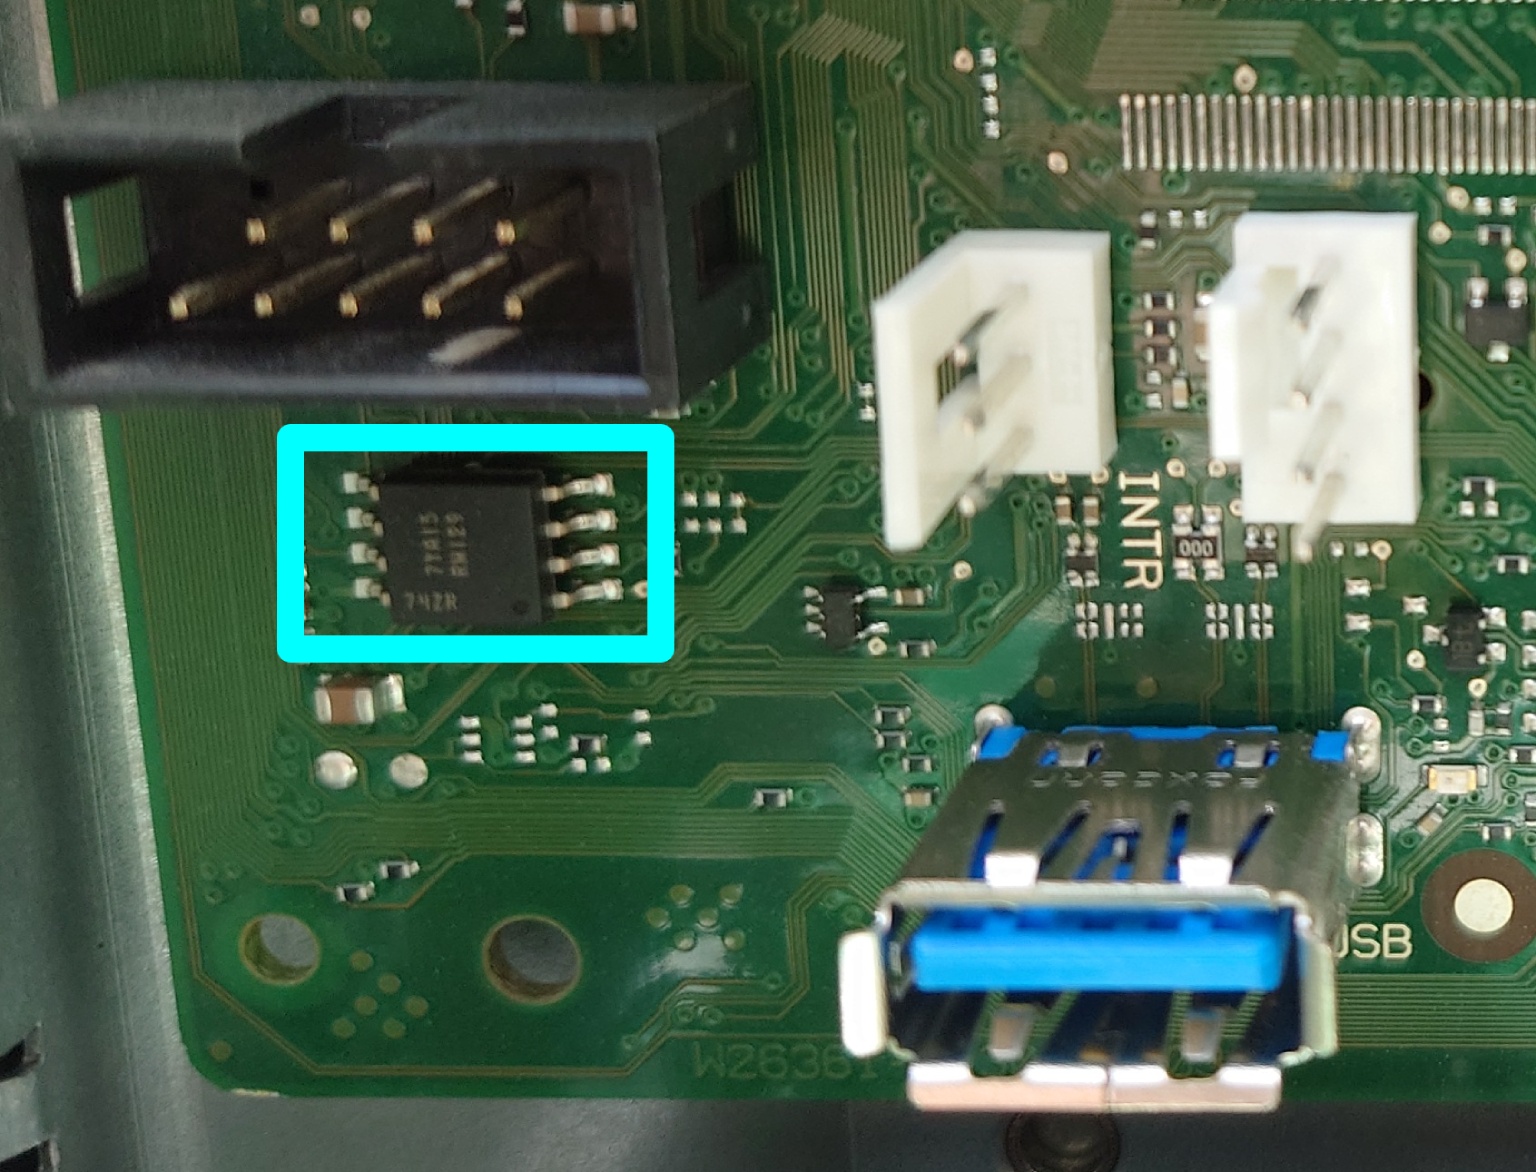
My TX1320 M3 came with BIOS 1.19.0, which does not support Xeon v5 CPUs. Not knowing the iRMC S4 password, it was not possible to flash a newer BIOS via iRMC. But, the SOIC8 that contains the BIOS was easily located (on the front of the motherboard, near to the INTR header and internal USB3 port).
The BIOS update D3373-B1.ROM file provided by Fujitsu is exactly 8388608 bytes. So, updating the BIOS requires only a ch341a programmer and a SOIC8 chip-clip. Dump the current BIOS, replace the last 8MB with D3373-B1.ROM downloaded from Fujitsu, and reflash to have support for a Xeon v5 CPU:
$ sudo flashrom -p ch341a_spi -c "N25Q128..3E" -r TX1320.bin
$ dd if=D3373-B1.ROM of=TX1320.bin bs=1M seek=8
$ sudo flashrom -p ch341a_spi -c "N25Q128..3E" -w TX1320.bin
After booting Linux, it is easy to reset the iRMC S4 password using ipmitool.
iRMC S4 on the TX1320 M3 motherboard has the UART routed to an unpopulated header and has the same parameters as the TX140 S2: 38400n8.
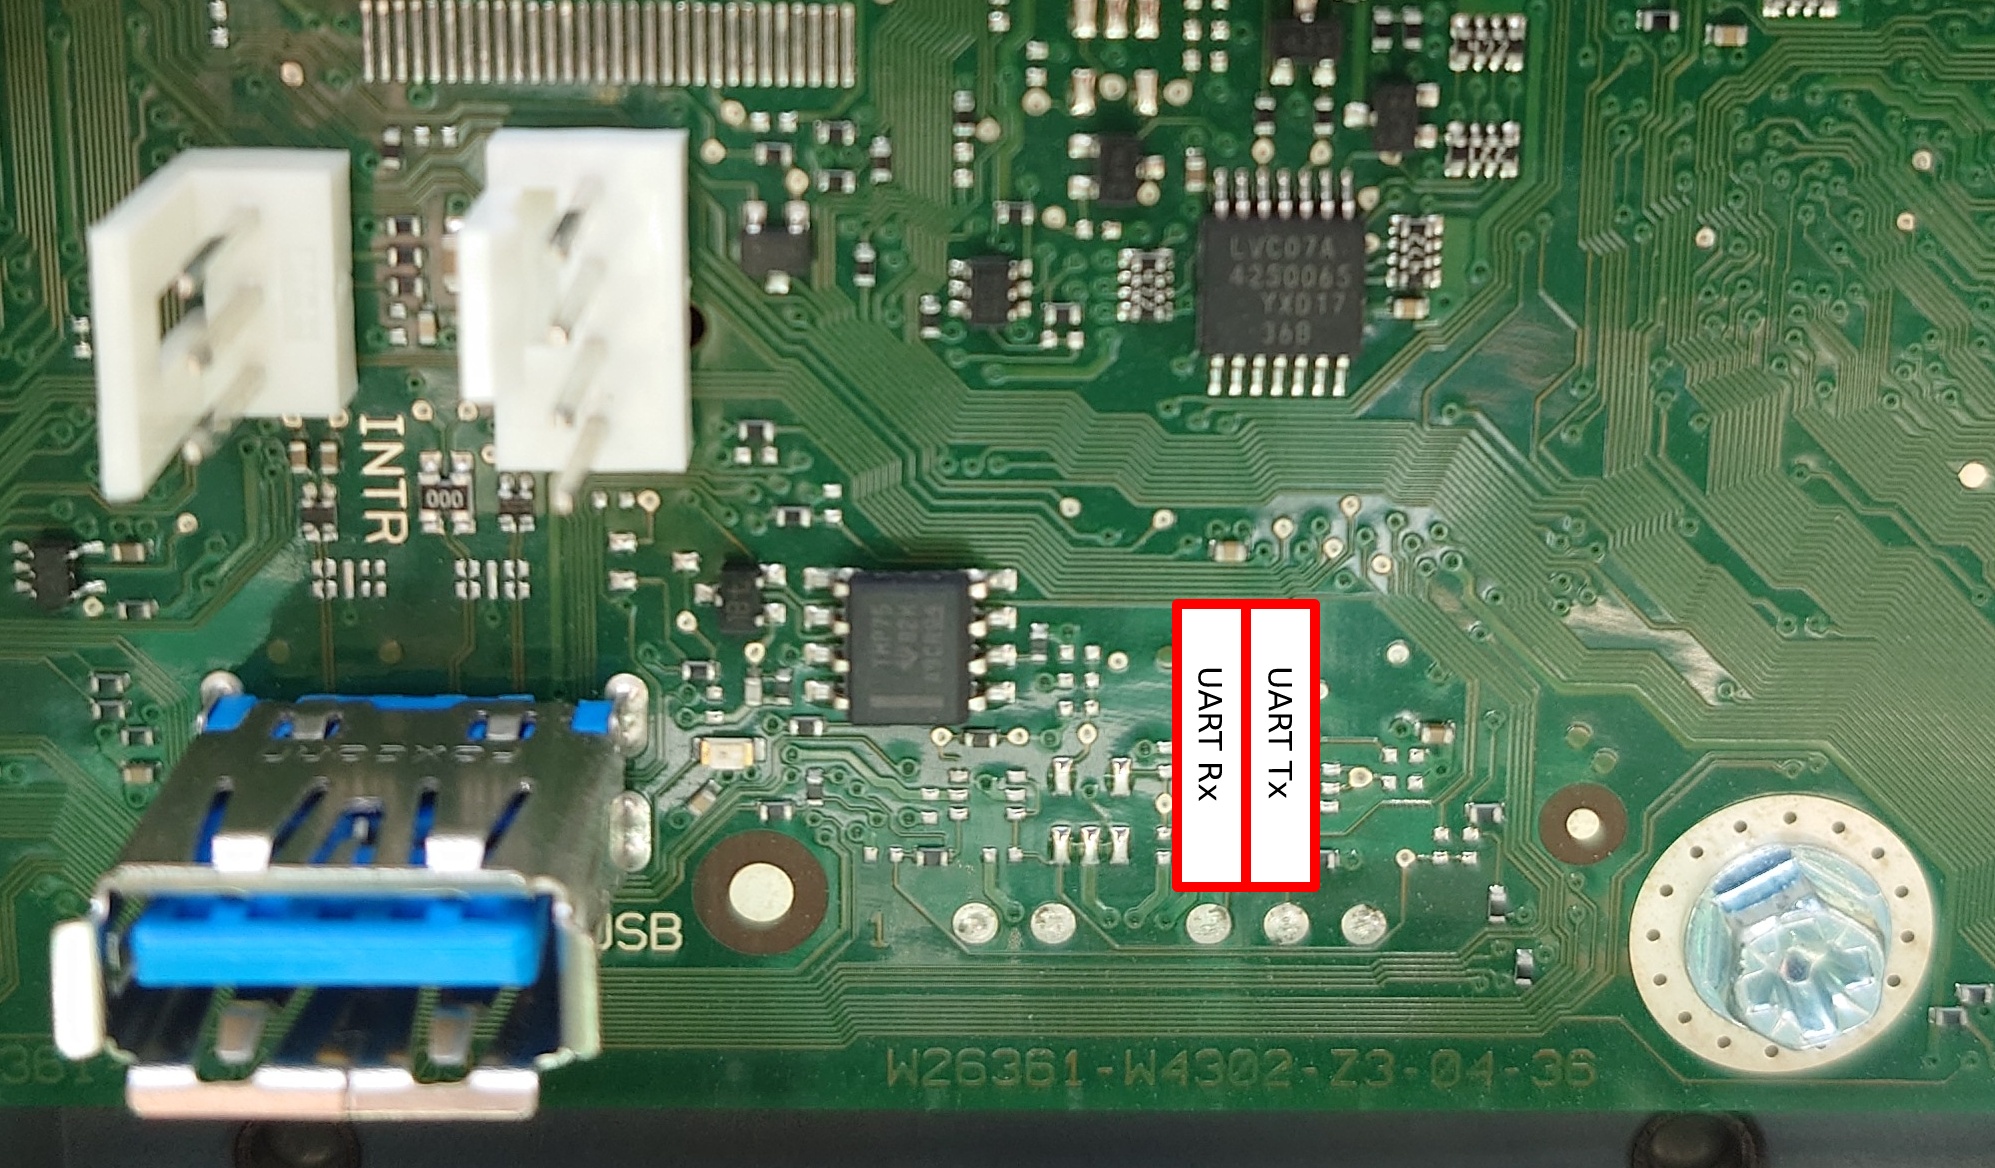
The pin beside UART Tx is not a ground, it’s a GPIO from the Pilot III. Pin 3 of the INTR header (closest to the USB port) is GND and fits a 2.54mm prototype wire. The iRMC S4 bootlog is available in this gist.
UART access does not instantly make you god of iRMC S4. After booting, remmman is running on the uart, so without knowing a valid username and password, you can’t gain access. u-boot is built with the dhcp and tftpboot commands, so you could potentially boot a modified image from the network that would give you root access (untested).
The GPL components of iRMC S4 are available on GitHub.
The Fujitsu 250W power supply (Model: CPB09-045E, S26113-E564-V71-01) has the dimensions 93x71x187mm, which should allow for the installation of a TFX PSU (85x65x175mm) in the chassis with minimal modification. Being a Fujitsu workstation, the power supply pin-out is identical to the TX140 S2.

The SATA power connector on the motherboard is a Molex 5559 2×4 with the following pinout (top view, looking toward PCB):
GND* 5V GND 12V*
GND* 5V* GND* 12V*
The 2.5″ backplane (Fujitsu P/N: A3C40176096) has a Molex 5559 2×2 power connector with the following pinout (top view, looking toward PCB):
GND GND*
12V 12V*
Note that only the the conductors marked with * are populated in the Fujitsu wiring harness.
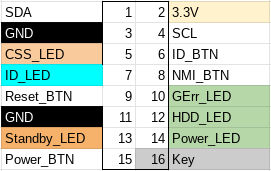
The 16 pin front-panel header has the same pinout as the TX140 S2:
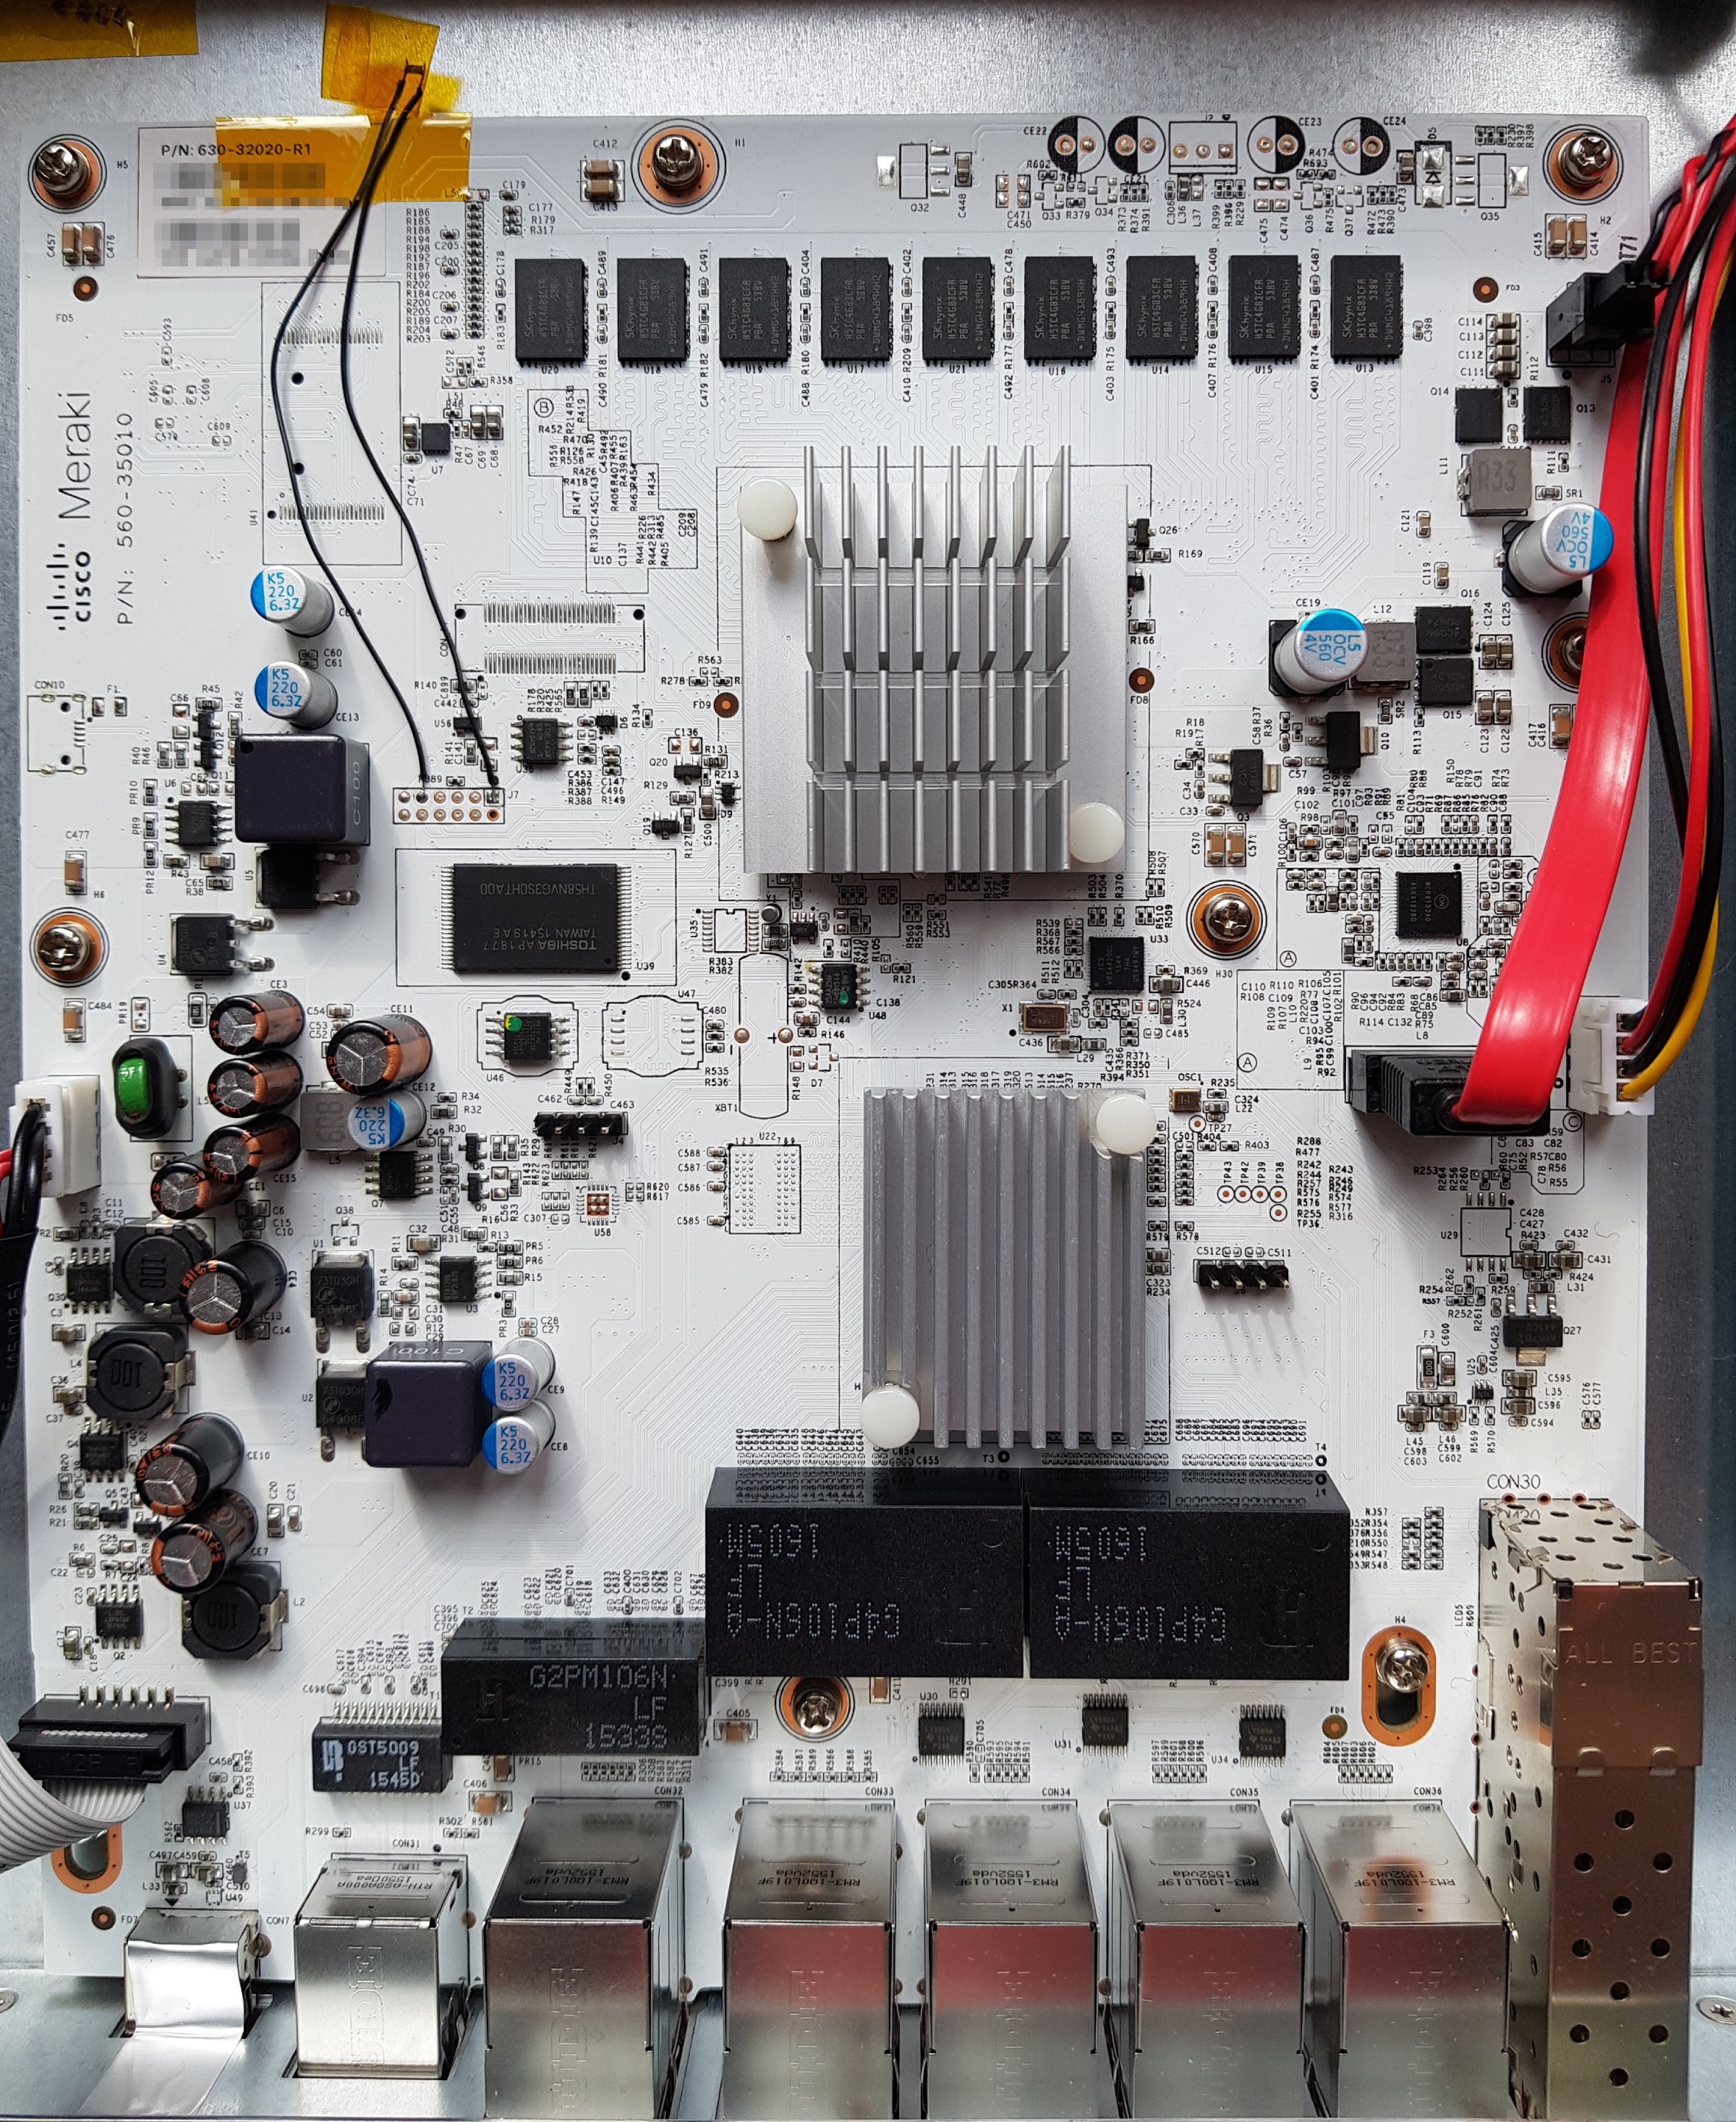
As expected, we find two I2C EEPROMs (TSSOP8) and a Texas Instruments LM75 temperature sensor (VSSOP8) on the front-panel PCB (Fujitsu P/N: A3C40167342).
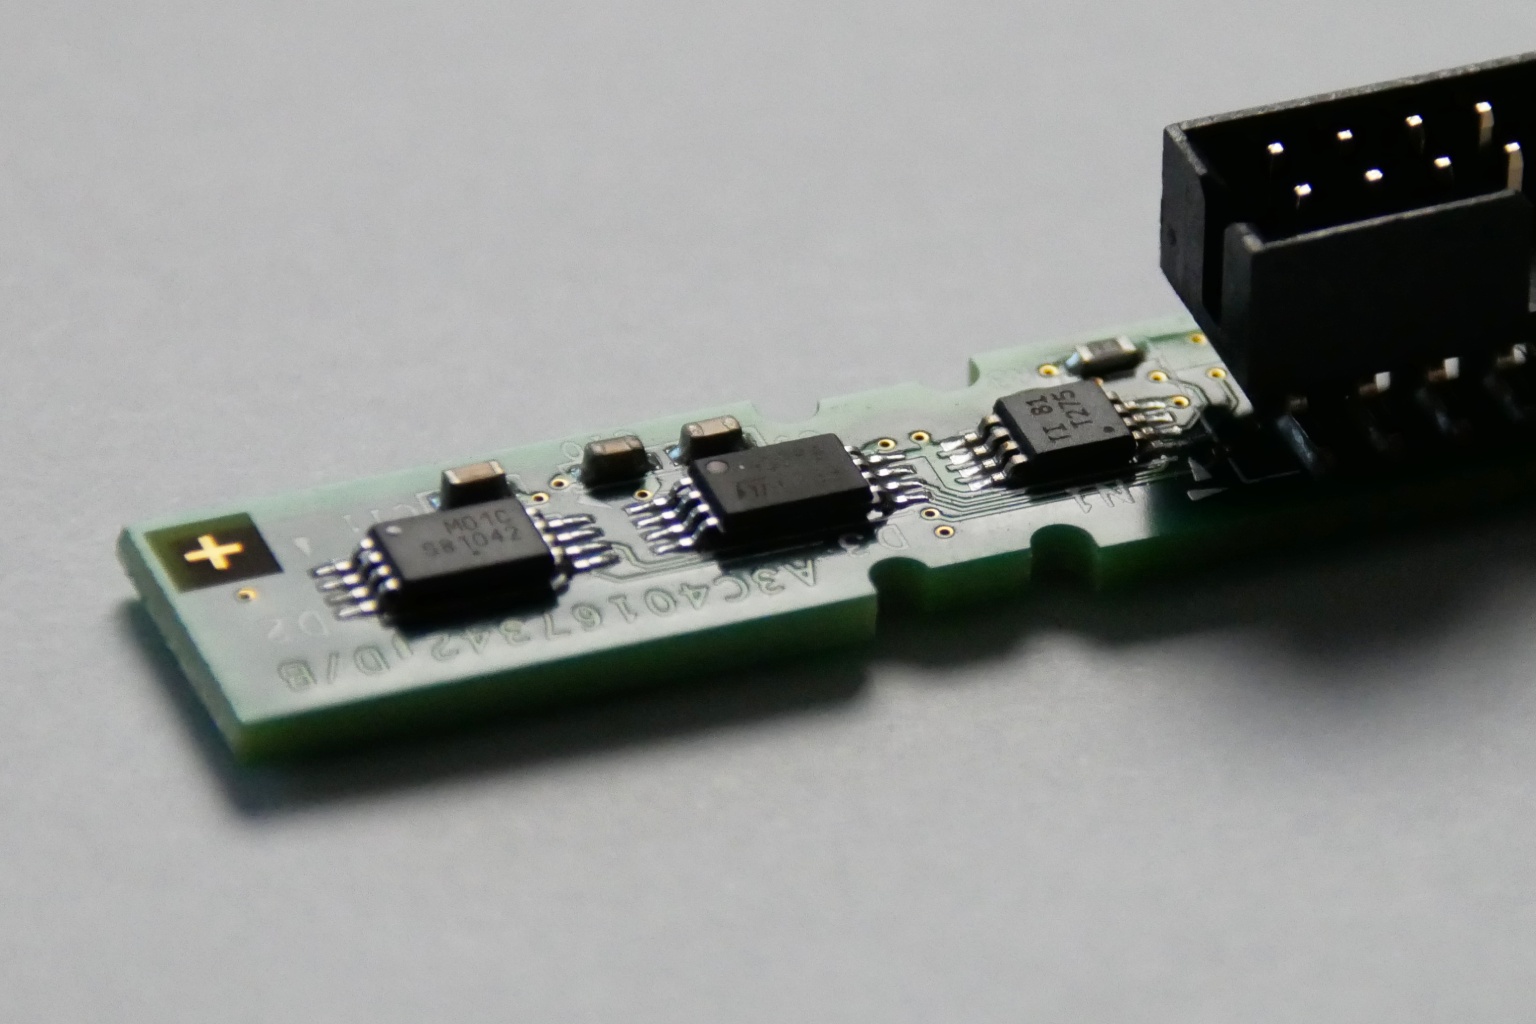
TX1320 M3 front-panel PCB
The TX1320 M3 noise profile is excellent, it is slightly audible during POST, but inaudible once booted into the OS (Linux).
The CPU cooler (V26898-B1003-V1/A3C40175673/A3C40175674) is a small dual heat pipe design with two towers with a fan (Delta AFB0712HHB) sandwiched between. The hot-swap 2.5″ drive bay has a single fan AVC DA07020B12M installed in a toolless plastic bracket. The design expects one fan per backplane, so if you install a second backplane to expand to eight 2.5″ drives, a second fan and bracket may be necessary.
lspci output:
00:00.0 Host bridge: Intel Corporation Xeon E3-1200 v5/E3-1500 v5/6th Gen Core Processor Host Bridge/DRAM Registers (rev 07)
00:14.0 USB controller: Intel Corporation 100 Series/C230 Series Chipset Family USB 3.0 xHCI Controller (rev 31)
00:14.2 Signal processing controller: Intel Corporation 100 Series/C230 Series Chipset Family Thermal Subsystem (rev 31)
00:16.0 Communication controller: Intel Corporation 100 Series/C230 Series Chipset Family MEI Controller #1 (rev 31)
00:16.1 Communication controller: Intel Corporation 100 Series/C230 Series Chipset Family MEI Controller #2 (rev 31)
00:17.0 SATA controller: Intel Corporation Q170/Q150/B150/H170/H110/Z170/CM236 Chipset SATA Controller [AHCI Mode] (rev 31)
00:1c.0 PCI bridge: Intel Corporation 100 Series/C230 Series Chipset Family PCI Express Root Port #5 (rev f1)
00:1c.5 PCI bridge: Intel Corporation 100 Series/C230 Series Chipset Family PCI Express Root Port #6 (rev f1)
00:1c.6 PCI bridge: Intel Corporation 100 Series/C230 Series Chipset Family PCI Express Root Port #7 (rev f1)
00:1f.0 ISA bridge: Intel Corporation C236 Chipset LPC/eSPI Controller (rev 31)
00:1f.2 Memory controller: Intel Corporation 100 Series/C230 Series Chipset Family Power Management Controller (rev 31)
00:1f.4 SMBus: Intel Corporation 100 Series/C230 Series Chipset Family SMBus (rev 31)
01:00.0 VGA compatible controller: Matrox Electronics Systems Ltd. MGA G200e [Pilot] ServerEngines (SEP1) (rev 05)
01:00.1 Co-processor: Emulex Corporation ServerView iRMC HTI
02:00.0 Ethernet controller: Intel Corporation I210 Gigabit Network Connection (rev 03)
03:00.0 Ethernet controller: Intel Corporation I210 Gigabit Network Connection (rev 03)
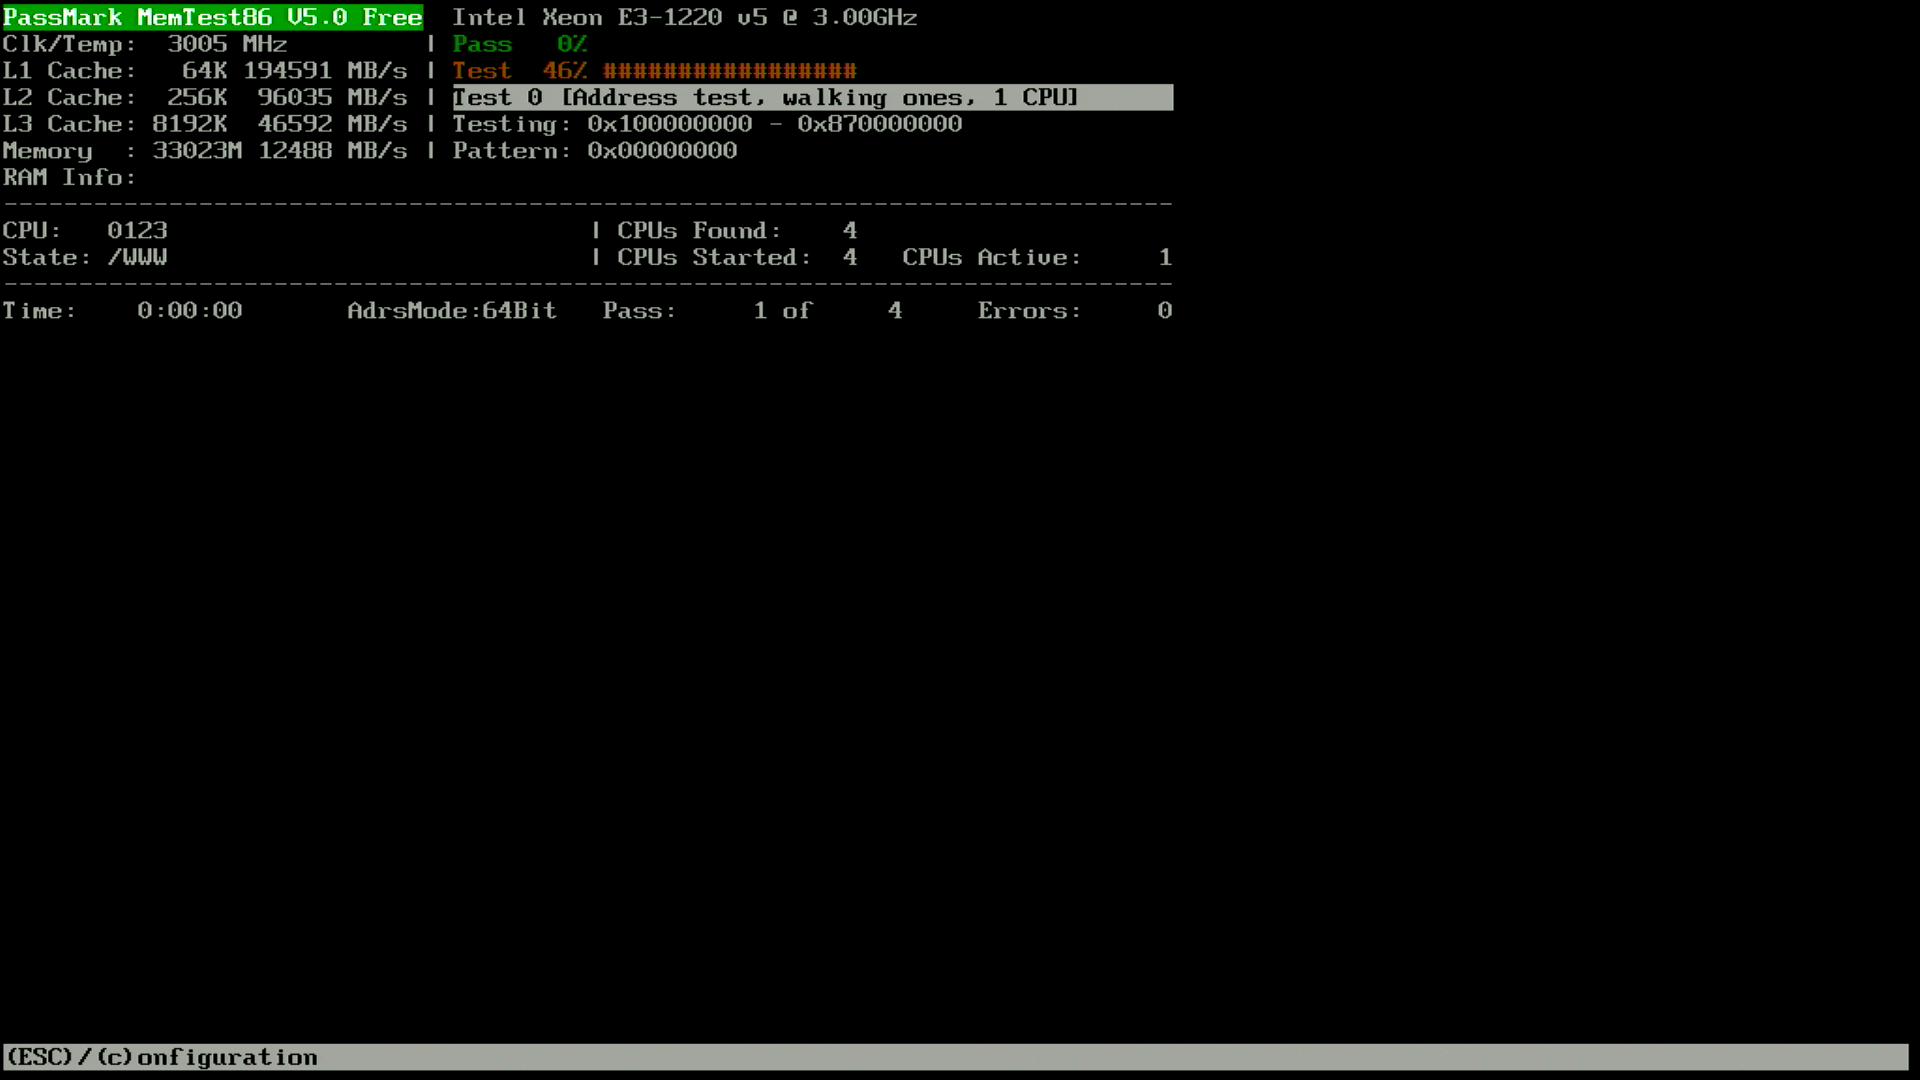
For those looking to install 32GB unbuffered DIMMs, unfortunately there is no support for that on the TX1320 M3. The capacity is recognized, and I was able to open UEFI Setup, as well as boot the Arch Linux installer, however if the CPU addresses beyond 16GB a non-maskable interrupt (NMI) is generated and the system halts.
The TX1320 M3 is not a compelling upgrade for those who already have something like the TX140 S2: performance and power consumption are quite similar between the two generations. Only if you need more bandwidth than PCIe 2.0 offers would upgrading to the TX1320 M3 (PCIe 3.0 x8/x8/x4/x1) make sense over the TX140 S2 (PCIe 3.0 x8, PCIe 2.0 x8/x4/x1).
Power consumption:
- 4W when powered off (iRMC powered, management NIC connected at 1000MBit)
- 16W when idle in Linux (Xeon E3-1220 v5, 2x16GB DIMMs, 16GB boot SSD, 1xEthernet, iRMC management Ethernet)
If you do not already have a Fujitsu and are interested in a low-power server, then the TX1320 M3 (or TX1330 M2 which also uses the D3373 motherboard) is a good choice. Of course, iRMC S4 is onboard, so with a little effort you can have an Advanced license 😉
Given that the D3373 motherboard is mATX compatible, I consider it a worthwhile purchase for the chassis alone. Note that the IO shield is integrated into the chassis, so you would need to remove this with a rotary saw to install another motherboard.
D3373-B1.ROM: 8cf71990597df6561b9c7c3e2c1b7e4c4b373a7a63271ba1a93bab9f50e0903f
(The following content was added in January 2024)
If you want to expand the capacity of the system to 8 drives, you will need to purchase another backplane as the one shipped in the system only supports four 2.5″ drives.
I can confirm that the Fujitsu 8 port backplane (P/N: A3C40173252) fits mechanically with zero modifications.
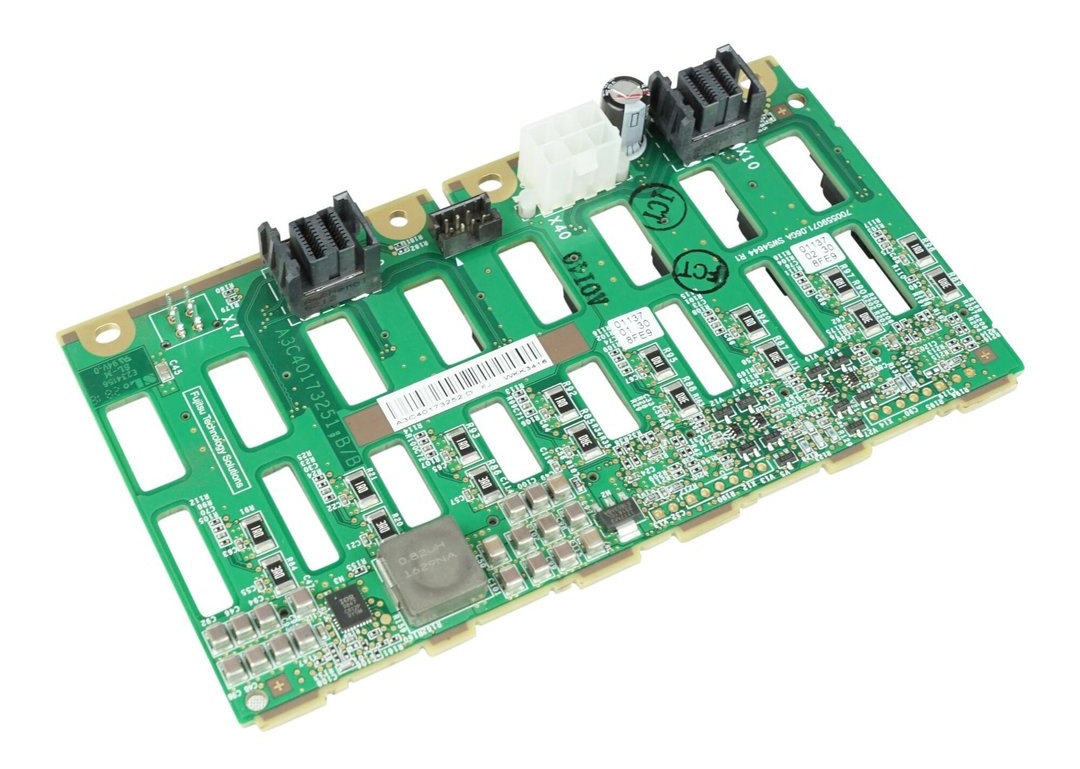
The 8 port backplane can be found for the same price (29€) as most sellers are asking for the 4 port model, and simplifies the cabling. You only need one power cable and one I2C cable with the 8 port backplane, although two of each cable are provided in the TX1320. You will need an additional SATA/SAS controller though, as the D3373 has only one Mini-SAS HD connector for up to 4 devices.
You can use the original Molex 5559 power cable (2×2 positions; 2 populated) from the TX1320 with the 8 port backplane without modification; below is the pinout of the original power cable (2×3 positions; 6 populated) marked on the PCB as X40:

A3C40173252 SAS backplane power receptacle (X40)
Older revisions of the backplane also have a Micro-Fit 3.0 (Molex 430450412) populated on the PCB as X17 which offers 12V and 5V voltage outputs. Note that the below pinout is for the cable, not the X17 receptacle:

A3C40173252 X17 cable pinout
Note that you still need to provide cooling for the additional drive bays, which cannot easily be done as the plastic fan duct has no official part number (as noted by Artur in the comments).